
Craft, hobby, art form, knitting alternative, blast from the 70s past — macrame is more popular than ever. If you’re interested in learning how to macrame, you’re in the right place.
This article will give you a quick explanation of macrame and equip you with everything you need to know to get started.
Table Of Contents
- What Is Macrame?
- Basic Macrame Supplies
- How To Macrame
- Your First Project: How To Macrame A Plant Hanger
- More Projects To Try
- Tips For Learning How To Macrame
What Is Macrame?
Macrame uses knots instead of weaving or knitting to transform cord, rope, or other fiber into a fabric that, in turn, can be fashioned into decorative, wearable, or functional designs.
Historically, knot-like designs appear in early Babylonian and Assyrian carvings. Arab weavers enhanced their towels, veils, and garments with knotted fringes. In fact, “macrame” is derived from an Arabic name. And in the 1970s, macrame was one defining feature of the “hippie aesthetic.”
Is Macrame Hard?
Like any other skill or craft, macrame has a bit of a learning curve, but it’s actually not too difficult to master.
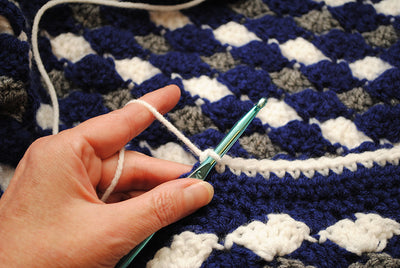
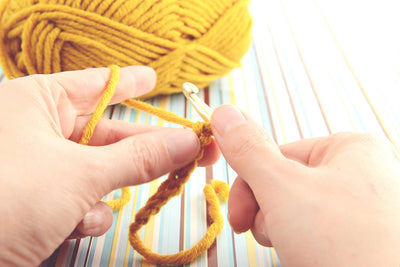
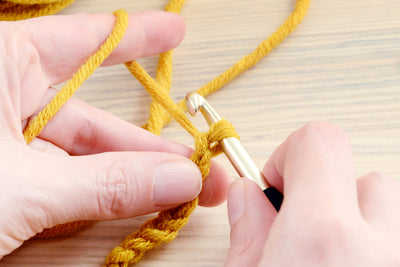
Compared to similar crafts, like knitting or crocheting, many makers consider macrame easier since you don’t have to use a tool. There are no knitting needles or crochet hooks to figure out. Instead, you use your hands to tie the knots.
Start simple and build from there. Learn a few basic macrame knots and practice them until they feel natural. Pretty soon, you’ll be a macrame pro!
What Can You Make With Macrame?
Once you learn how to macrame, you can make almost anything imaginable.
Some simple items you can try include earrings, bracelets and other types of jewelry, pot holders, and wall art. More advanced projects could include hats, handbags, sweaters, tunics, and other pieces for your wardrobe.
Here are a few basic supplies you’ll need to get started when learning how to macrame.

Basic Macrame Supplies
Macrame doesn’t require a lot of tools or supplies to get started. You can outfit a basic macrame kit with just a few things.
A Rod Or Stick
This serves as the foundation for whatever you’re creating except, unlike a foundation that you build on top of, this is the stabilizer that you hang your work from as you tie your knots.
You don’t need anything fancy. A repurposed broom handle, branch, or dowel will do. You can even use a hoop or ring — anything that will hold your cord as you tie knots in it.
Measuring Tape
This will help you when deciding how much cord you need or what finished length you want something to be. Measuring helps avoid waste or the disappointing “oops” of something being too short.
Scissors
You’ll need to cut your cord into the lengths you desire and also trim edges. Scissors work much better than your teeth. Just make sure they’re sharp scissors. Otherwise, they won’t cut cleanly through the thicker cord.
Macrame Cord
Of course, you’ll need something to tie into knots. In principle, you can use any cord, twine, rope, yarn, or thick thread — if you can knot it, you can probably macrame it. But, in practice, there are differences among these items.
To begin, you’ll want something that is simple to tie and does not unravel too easily. Inexpensive twine made of coarse stands may quickly turn into a mess of single threads, which can make tying frustrating.
You’ll also want something that is easy on your fingers since you’ll be working closely with the material and manipulating it constantly.
Cord is frequently used for macrame and is a great choice. Not all cord is equal, though. Some can be rough and irritating, while some cotton cord is uniform, soft to the touch, and can make beautiful macrame.
GANXXET macrame cotton cord, for example, is extra soft on your hands and super smooth. It avoids that uneven fishbone look where cord threads appear out of place and can make a decorative piece look less than stellar.
Additional Tools And Supplies
While the above list of macrame supplies will get you started, you may want to add a few more things to round out your collection.
Embellishments
Some projects look great with just the patterns in the cord. But sometimes, you want to add a little something more. That’s where embellishments come in. You can use different items as decorations, such as:
- Wooden beads
- Artificial flowers
- Shells
- Feathers
Fringe Brush
Have a project with fringe in mind? Make it easier to create by picking up a Macrame Cord Fringe Brush. The metal bristles work wonders on the cord, helping create a soft, straight fringe.
Stiffening Spray
Feathers are a popular macrame project. If you plan on making any, stiffening spray will come in handy. It helps the feather keep its shape, so it lasts longer.
Once you get your starter set of supplies (and any extras you want), you’re ready to begin mastering knots. Below you’ll find a few to start with.
How To Macrame
To macrame, you must tie knots into your cord. Knots are the backbone of macrame, so make it a point to practice the ones you’re learning.
At first, it may feel strange. You might need to watch the videos for each knot multiple times until you get the hang of it. But once you develop some muscle memory, you won’t even have to think about it anymore. You’ll just tie the knots properly.
Basic Macrame Knots
Tying knots is not unique to macrame. Sailors invented many of the knots we see in the nautical world. Let’s take a look at how to master these basic knots.
Lark’s Head
A Lark’s Head Knot is a simple way to attach something — say a piece of jewelry — to a piece of cord. It is secure and looks great. But you can also include a series of Lark Knots as a design element.
To make a Lark’s Head Knot, follow these steps:
- Fold a length of cord in half.
- Slip the folded end of the cord behind the rod or stick you’re using to tie your piece to.
- Pull the cord up and over the rod, making sure not to twist the two loose ends.
- You’ll now have a loop in front of your rod and two dangling pieces of cord behind.
- Thread those two dangling pieces through the loop but beneath your rod.
- Pull them through to tighten the knot.
Take a look at this video for a detailed visual explanation:
Square Knot

Follow these steps to make a Square Knot:
- Begin with four cords tied to your rod (you can use the Lark’s Head Knot to fasten them).
- The middle two cords of your four cords will remain stable and are called the “anchor cords.”
- Bend the right cord over the two anchor cords so that it leaves a loop to the right.
- Place the left cord overtop the end of the right cord that is now horizontal.
- Bring the left cord under the anchor cords and through the loop formed at the right by the right cord.
- Pull this tight to complete the first half of your Square Knot. To complete the second half, you’ll repeat the process in the opposite direction.
- Take the left cord and bring it over the two anchor cords, leaving a loop to the left.
- Place the right cord on top of the left cord that is now horizontal.
- Bring the right cord under the anchor cords and then through the loop formed at the left by the left cord.
- Pull the cords tight and you’ll have a completed Square Knot.
If you’re more of a visual learner, this short video shows you how to tie the Square Knot:
Spiral Knot
The Spiral Knot looks great and, as its name implies, spirals all by itself. If you’ve mastered the Square Knot, it’s super simple to do: just complete the first half of your square knot, then repeat without changing directions.
So, if you began your Square Knot with the right cord, you’ll begin the second half of the knot with the right cord again. Depending on which cord you begin with and repeat, you can change the direction of the spiral.
Here’s a video tutorial:
Half-Hitch Knot
You probably already know how to tie a Half-Hitch Knot, you just may not realize that’s what it’s called. A Half-Hitch Knot is a simple overhand knot. To tie one, you need to:
- Hold one end of your cord and loop it over itself to create an “X”
- Put the other end through the center of the “X”
- Pull tight to secure everything
As mentioned earlier, it’s often easier to see someone else tying the knot instead of trying to follow written directions. Here’s a quick look at how to tie this knot:
One of the best things about this knot is that you can easily mix it up to create unique looks in your pieces. You can make:
- Double Half-Hitch Knots (also known as a Clove Hitch Knot)
- Diagonal Double Half-Hitch Knots
- Alternating Half-Hitch Knots
- Half-Hitch Spiral Knots
Let’s quickly look at each one before moving on to other knots that aren’t Half-Hitches.
Double Half-Hitch Knot
A Double Half-Hitch Knot is great for adding lines to your creation, but it’s a little more complex and may take a bit of practice when you’re learning how to macrame.
Written step-by-step instructions for this one can sound more complicated than the knot really is. So, see this video tutorial to master it:
Diagonal Double Half-Hitch Knots

Now that you know how to tie a Double Half-Hitch Knot, you change the direction you’re tying in to create stunning effects. If you’ve seen diamonds in macrame before, the artist likely used Diagonal Double Half-Hitch Knots to create them.
Instead of going straight across when tying your Double Half-Hitch Knots, you simply hold the cord at an angle. This causes your knots to form a diagonal line instead of a horizontal one.
The video in the Double Half-Hitch section covers this knot if you skip to the 3:05 point.
Alternating Half-Hitch Knot
If you alternate the side of the cord you use to create the knots, you’ll be tying an Alternating Half-Hitch Knot. Simply move from left to right as you’re tying.
Here’s a quick video to see how it’s done:
Half-Hitch Spiral Knot
Like the Spiral Knot above, you can tie multiple Half-Hitch knots in succession to create a spiral effect. Begin by tying four Half-Hitches. Then, push them close together to ensure they’re tight.
Then, rotate your anchor cord to the right. Make sure you pass it under the working cord.
When it’s aligned properly, tie five more Half-Hitches. Continue rotating the cord every five knots to help your spiral take shape.
You can see how to create this knot in this video:
Berry Knot
The Berry Knot is highly decorative and produces a berry-like ornamental knot that you can use as an accent. Watch this video to master it:
Gathering Knot
Have you ever seen a macrame plant hanger? Often, they have a Gathering Knot at the top. It looks like a strand has been wrapped around the anchor cord repeatedly.
And that’s essentially what you do. Once you gather the strings for your project into one hand, you use another piece of macrame cord and wrap it around several times. Then, you tie it and cut the ends.
This video shows how it’s done:
Macrame Patterns
Once you can tie a couple of knots, you can start putting them together to create macrame. At first, following a pattern can help.
Macrame patterns are step-by-step instructions that guide you through a project. They provide information on the type of cord you’ll need, cord lengths, etc. They also take you through the right order of knots to achieve your finished product.
You can buy patterns online from macrame and craft sites. Many simple, free patterns are also available that are perfect to try once you’ve mastered your basic knots. For example, try this pattern for a macrame book holder.
Your First Project: How To Macrame A Plant Hanger
Looking for a first project that won’t demand advanced calculations? Try the ever-functional plant hanger.
You can make this beautiful hanger using only three basic knots. Take a look here:
More Projects To Try
Now that your first project is under your belt, you can move on to others. Let’s look at a few more beginner-friendly macrame pieces to try. For each, you’ll find a link to a blog post where you’ll get more detailed instructions.
Wall Hangings
From macrame rainbows that only use a Square Knot to a wall hanging that combines multiple feathers, you’ll love the variety of wall hangings featured in this post. They make incredible decorations for your home!
Headbands
Add some boho flair to your accessories with these adorable DIY macrame headbands. They come together quickly, so you can make a couple of color combinations to match anything in your wardrobe.
Coasters
Keep your wooden surfaces from getting damaged with these fun heart-shaped coasters. Since they only use two knots, you can whip one out in no time.
Pink or red cord works well, but you can change things up to match your home’s decor.
Tips For Learning How To Macrame

If your first few pieces didn’t turn out quite how you imagined, that’s OK. Learning a new craft takes time.
These tips can help you succeed with macrame.
- Untie and try again: If you don’t like how something looks, untie the knots and give it another go.
- Keep your knots tight: Loose knots look messy and can cause gaps in your work. Keep everything pulled tight to avoid these problems.
- Choose the right cord: Depending on your project, you may want to use thicker or thinner cords. Try a few different types and see what works best for you. A Curated Mystery Box from GANXXET can help you try new fibers and colors for a great price.
- Practice: The more you practice, the easier it’ll be to complete your projects.
- Keep trying: If at first, you don’t succeed, try, try again. This well-known expression applies to lots of things in life, including macrame. So don’t feel bad if you must start over and try again. It’s part of the learning process.
- Get creative: Once you tackle a few basic projects, it’s time to mix things up a bit. Choose a different color or try your own unique knot pattern. You’ll be amazed at what you can create.
- Connect with other macrame makers: Crafting alone isn’t nearly as much fun as crafting with others. See if you can find someone to macrame with you. If no one in your real-life circles is interested, connect with others online. The GANXXET Instagram page often features the work of talented artists, so give us a follow for inspiration.
Unleash Your Creative Energy With Macrame
As we’ve explored in this article, it’s easy to begin learning how to macrame. Simply follow the steps above, and you’re ready to begin your new hobby (or even business!).
But first things first: Finding the right source for your macrame cord is essential. GANXXET offers a wide selection of string, cord, and rope in a host of sizes and almost endless colors. Take a tour today to begin your macrame adventure!


Leave a comment