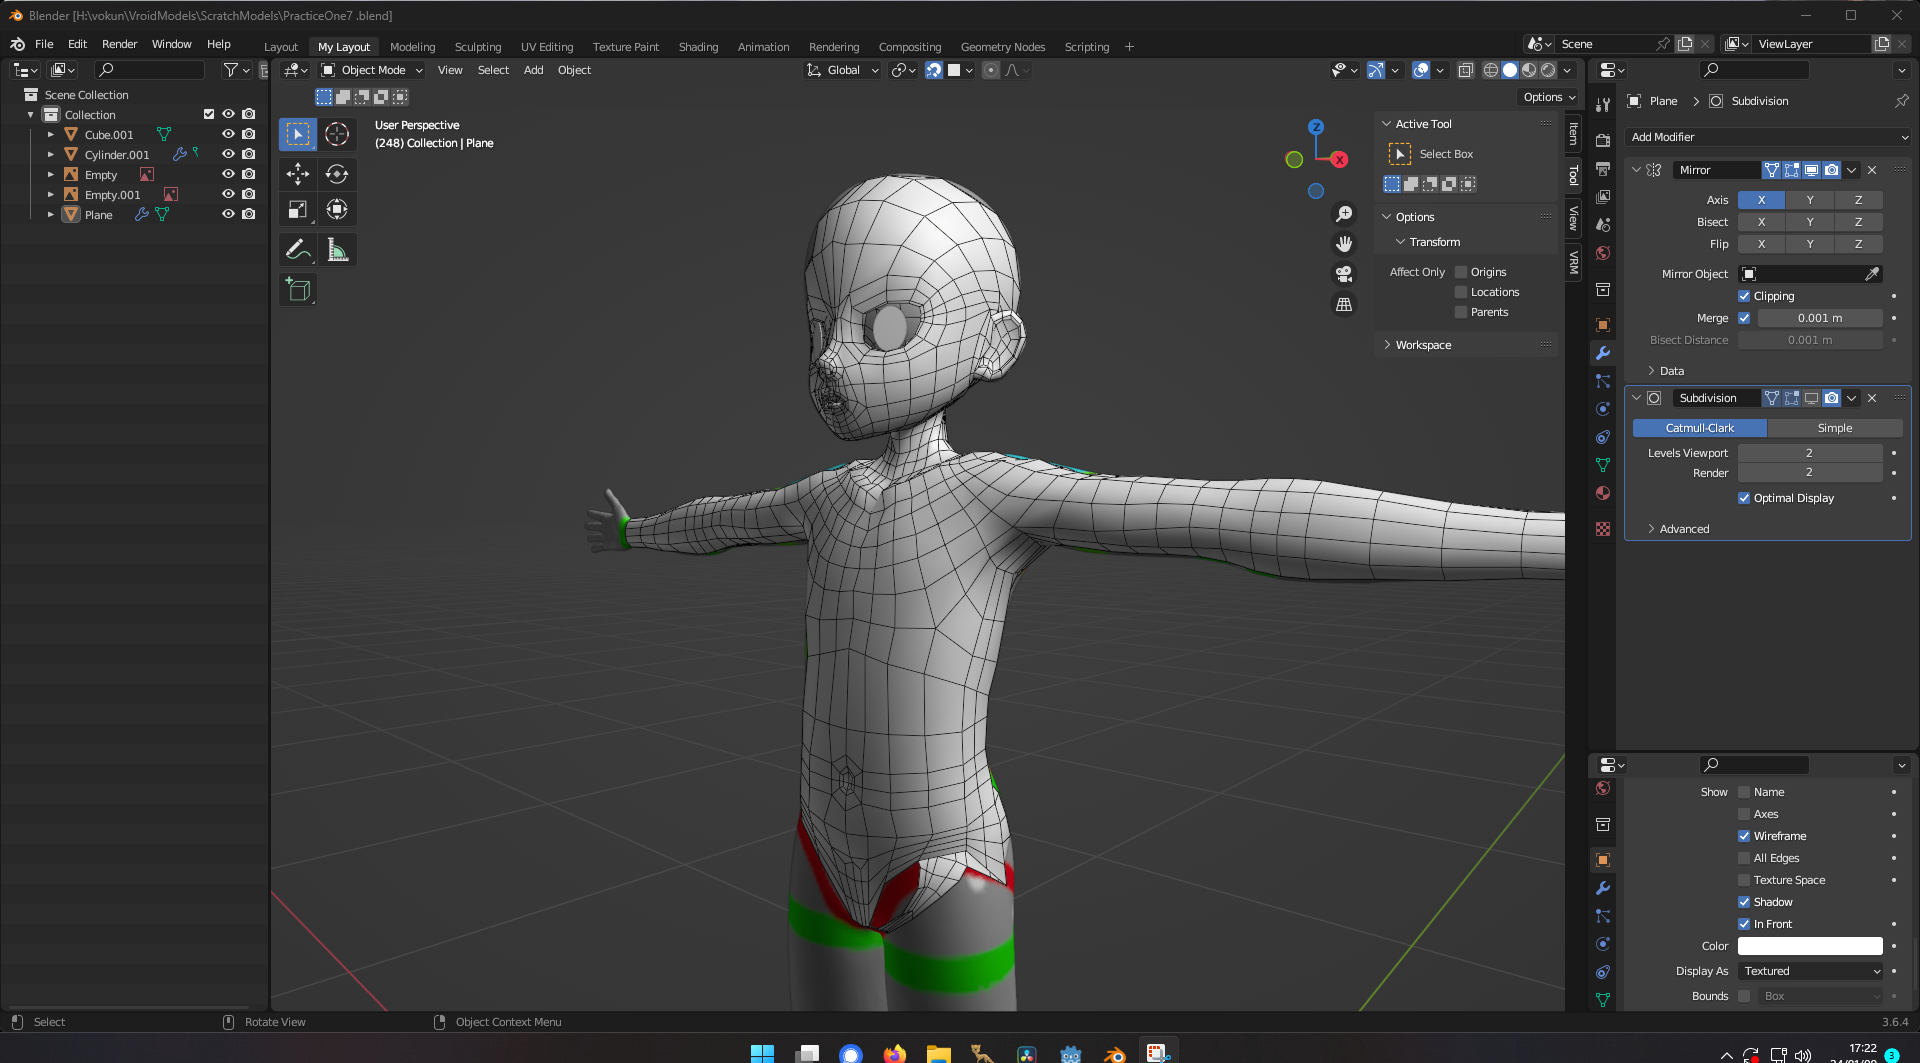
I’m planning on using this as a vtuber model’s head but I don’t know the first thinkg when it comes to topology so any advice or criticism is welcom ![]()
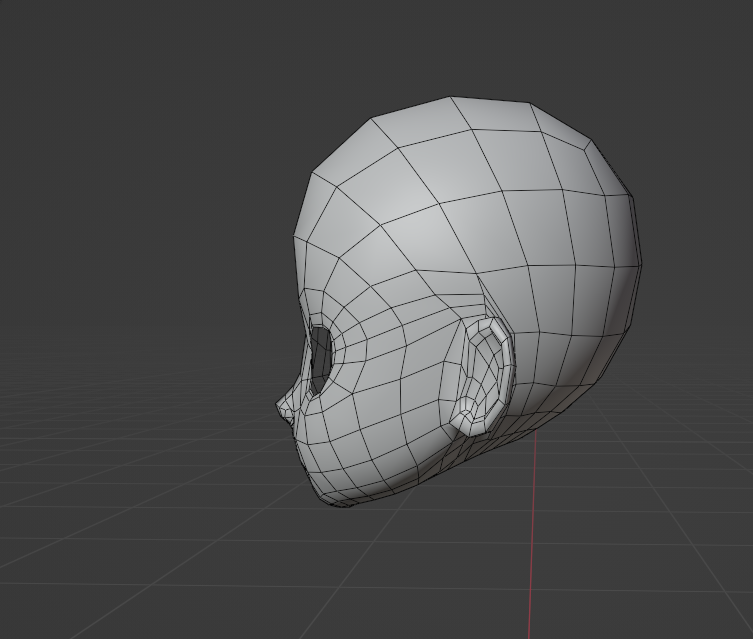
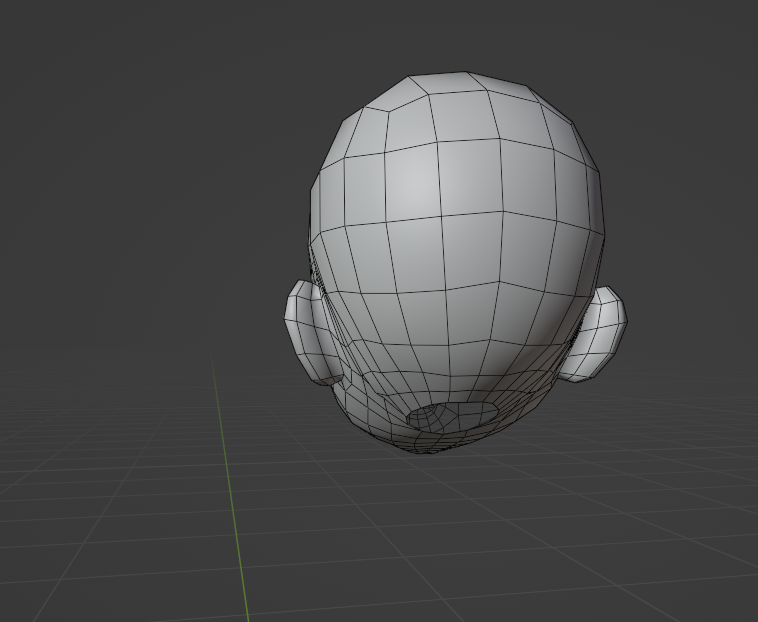
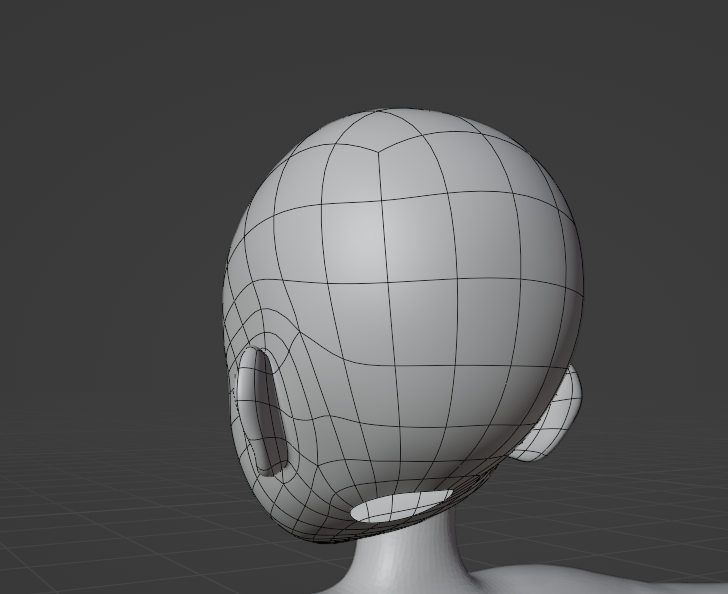
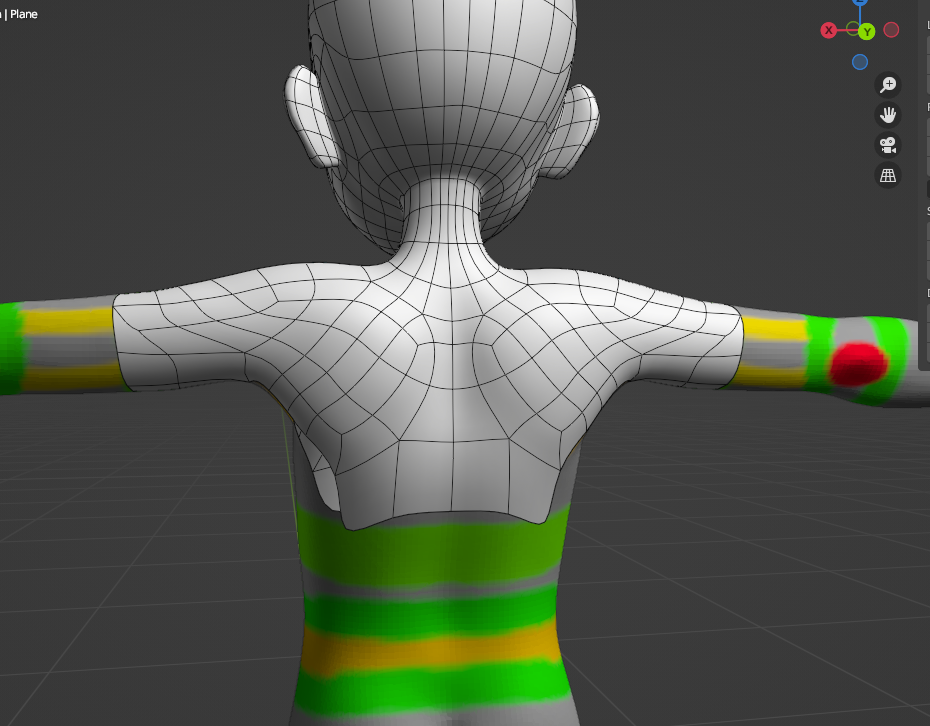
here is a view of the back… I feel like there’s way to many edges flowing into the neck area from the back of the head
Welcome!
Overall, you seem to have a good understanding of how to keep everything as quads, which is good.
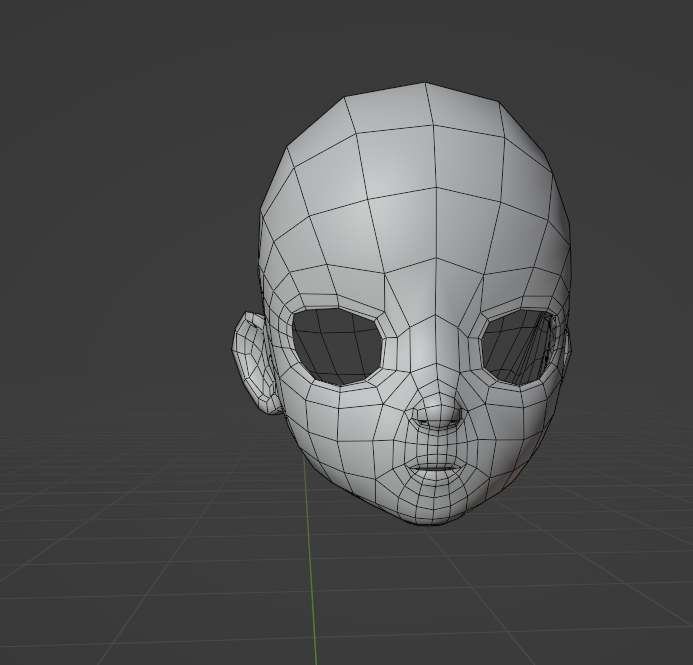
The area that risks giving you problems is the back of the ears. There are a lot of edge loops that get compressed into thin strips. This could give you some lumpy artifacts, especially if subdivided, and is going to be hard to flatten and smooth. In general, it’s better to keep faces more regular and square when possible for this reason.
You could either choose to combine those edge loops before they reach the ear, or you could choose to have them continue towards the back of the head instead of bending down (this is probably the better way, but will need more changes). Also, sliding some vertices to maintain a more regular square grid would help that area.
It doesn’t look that bad to me. In general, you have made a very low-poly character for today’s standards, even for a real-time application. Don’t be afraid to use the amount of detail you need. I wouldn’t judge the neck before you have actually created it. Don’t forget you will have to widen the neck at its base and connect it to a body (I assume you are making a full character), so those extra faces might be useful at that point.
Something else I was wondering: do you have the character’s eyes, or some mockup of their shape? It’s better to model a character with the eyes in place, as the eyelids will have to conform to them. If you finish the character and then try placing the eyes, you will have a bad surprise when they don’t fit.
this is what I did at the ears cause I noticed the pinching after trying to apply a subd modifier.
as for the eyes I don’t have spheres for them but rather flat elipses as that’s what most vtubing models use I noticed but to get started with scultping I did use spheres just to help get the right shape.
I also noticed some pinching on the bottom of the chin but I fixed that by just grabbing them with the snap setting on in edit mode and set to face project.
Also thanks so much for the feedback ![]() I’m super greatful
I’m super greatful
2 Likes
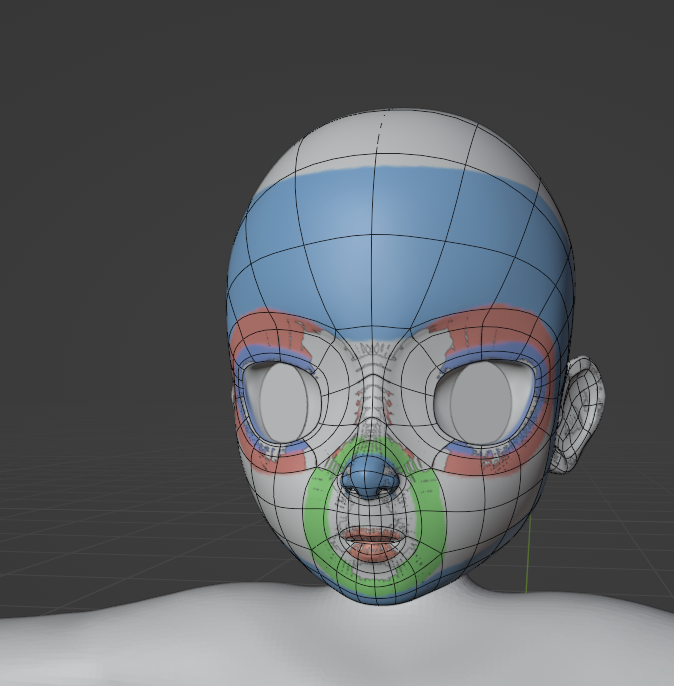
Just in case you’re interested this is what I have for the eyes. I haven’t actually modeled the sockets yet but I’m on my way to do so. Then I also have to do the mouth.
Just in case you were wondering I sculpted the entire body and head before starting the retopology
once again Thanks so much for the feedback I super appreciate ![]()
1 Like
I see, the position of the ear vertices is improved by the subdivision. You will probably be OK in this case.
Though, when I learned modeling, I was told you shouldn’t rely on the subdivision to fix the position of the vertices if you want to follow the best practices. If the subdivision changes the shape or topology a lot, you aren’t fully in control and the amount of distortion could cause you problems later with UVs and texture stretching.
This is what I would have done too. When doing a complicated shape, it’s often easier to first get the shape correct at any cost and only then worry about topology.
1 Like
actually I removed a lot of the verts behind the ear before applying the subdiv modifier.
to retopologize I used the shrinkwrap but in some cases and areas it’s just giving me a lot of headaches so in those cases I’m just using the snapping with face project turned on. heres a better shot of before I made the adjustments
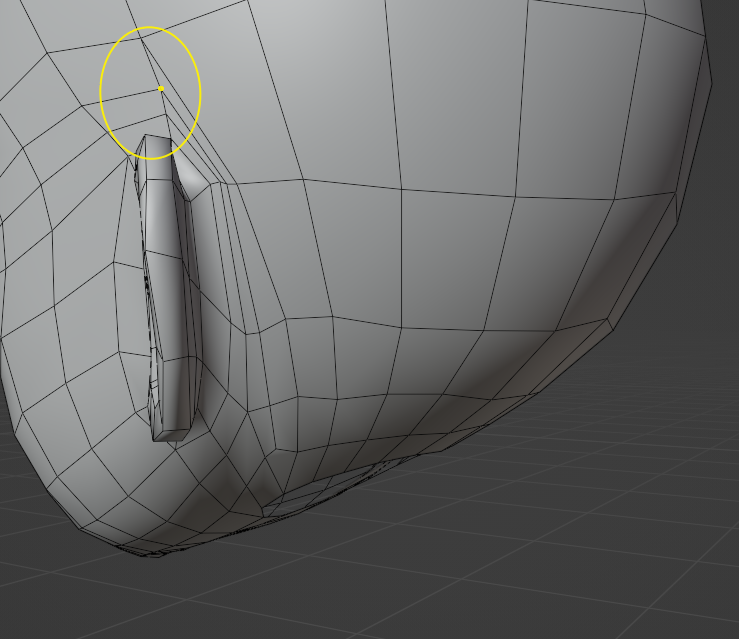
You can see here as apposed to before there’s approximately 2 fewer behind edgeloops behind the ear now compared to this screenshot and I think it is flowing a lot better now
1 Like
this is why I used shrinkwrap but in some places it would just refuse to actually snap vertices to the sculpt. and other times when I try to move vertices it would just yeet them to random areas on or IN the sculpt…
But I’ll definitely keep this in mind as I go forward.
I have tried modeling with blender before but those times I followed anime model tutorials and most of them consist of modeling each individual vertex directly from a reference picture without a sculpt as a base. So I’ve kinda known that propper topology especially when it’s going to get deformed is very important for it to deform properly.
also just in case you might know how to fix the issue with the shrinkwrap. I’m using it with the Project Wrap method and the snap mode set to Above surface. the limit is set to 0m and subdivision leves set to 2. Positive is checked. Negative unchecked Face Cull is off and Offset set to 0
and once again thanks a lot
1 Like
Maybe the actual position of the vertices has become too different from the shrinkwrapped result? I find that when doing retopology, it’s useful once in a while to apply the shrinkwrap modifier and re-create it, that way you can reset it to what you actually see on screen.
Oh thanks I noticed that as well I applied it at some point and just added a new one and then it was working better again but I though it was some sort of bug
I think I did this just after finishing the face and was about to start with the rest of the head and ears. I’m honostly not to sure but I did notice it working much better after that
1 Like
Really nice job so far. When using flat oval eyes, as mentioned the eyelids can be tricky. I made a tutorial for creating geometry node eyelids for flat eyes (there’s a separate video for adding eyelashes). The advantage is they perfectly conform to the eye oval shape and no need for an eye socket hole in the mesh. You can also make procedural eyelids which work well depending on the look you’re going for. However, the procedural eyelids don’t work as well when adding eyelashes.
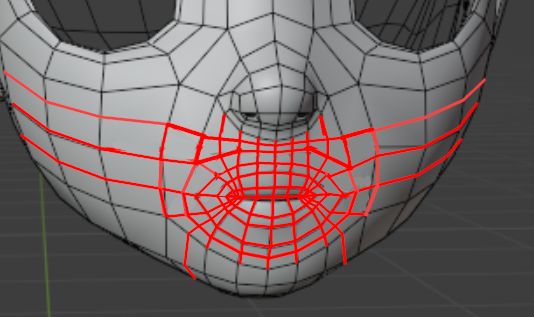
The only thing i find suspicious is there are no closed loops around the mouth. At least a couple would be useful
3 Likes
thanks I’ll definitely check it out tonight
thanks I thought that might be a problem but also that using a subd would prob fix it anyways but since you mentioned it I’ll add some ![]()
so I’ve started with the upper body and arms…
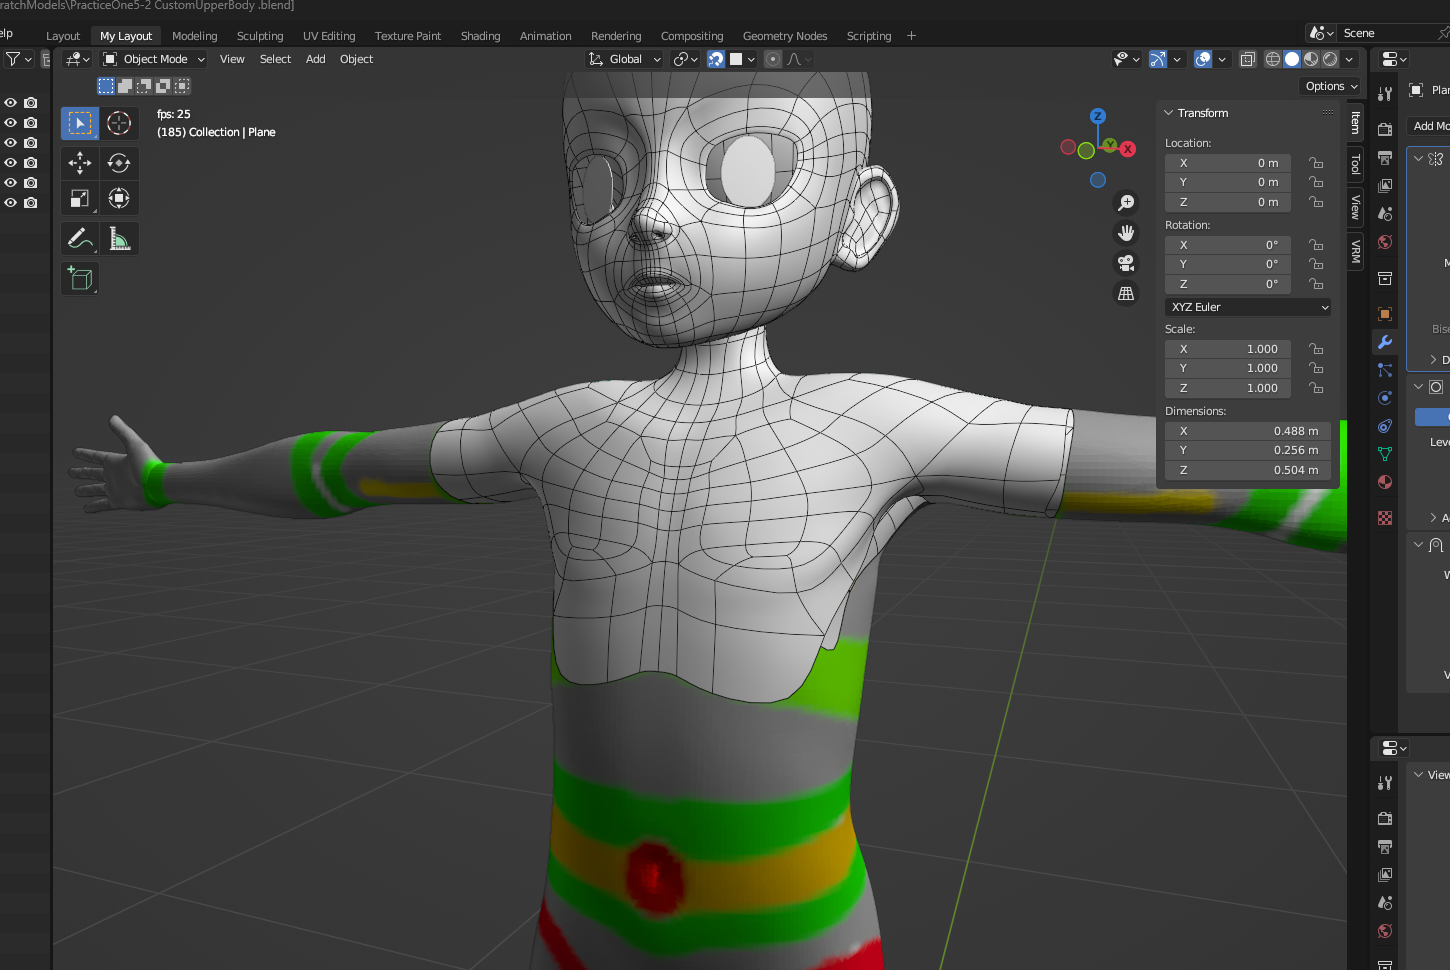
I still don’t know if this is any good though
once again any feedback would be appreciated
Overall, this is pretty good, though I have a few things to adress.
First potential issue I see is the bottom of the pecs. You have a topology like this:
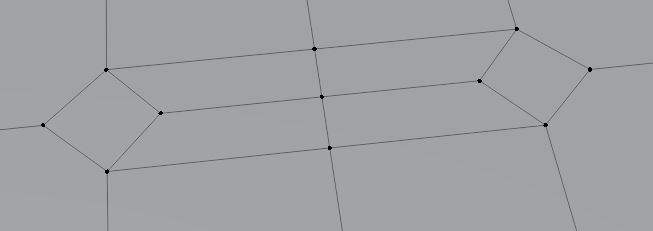
This is exactly the kind of topology I would use to create a crease or wrinkle on a subdivided model. It may not be a problem if you have spaced the edges enough, but you should watch that area and see if it forms a crease.
The next potential issue would be the 6-edge pole vertex at the armpits.

Those have a tendency to cause a slight pinching or shading problem as well as messier topology than is needed. This is especially a problem on an area of high curvature or deformation. In general, it’s best practice to avoid 6-edge poles on an organic model (5 are unavoidable).
happily, there is an easy procedure to fix them:
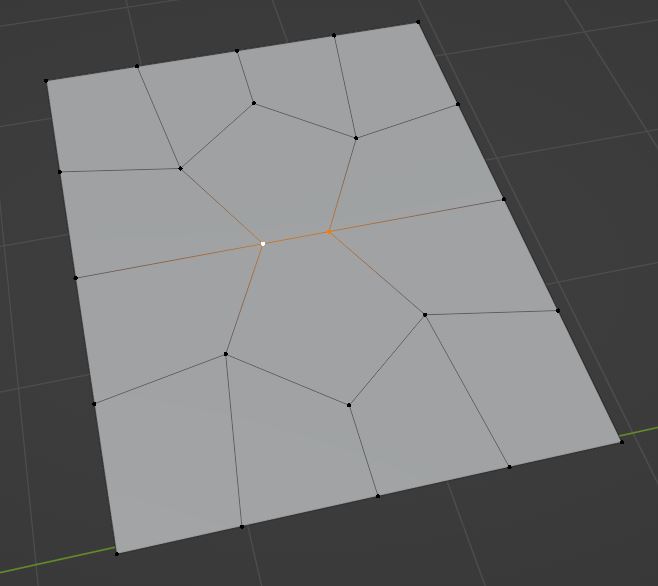
1- Bevel the central vertex.

2- You will get 2 symmetrical groups of 3 vertices. Merge each group into a single vertex.
3- You will get 2 five-sided faces facing each other. Connect them from tip to tip, splitting their shared edge in half.
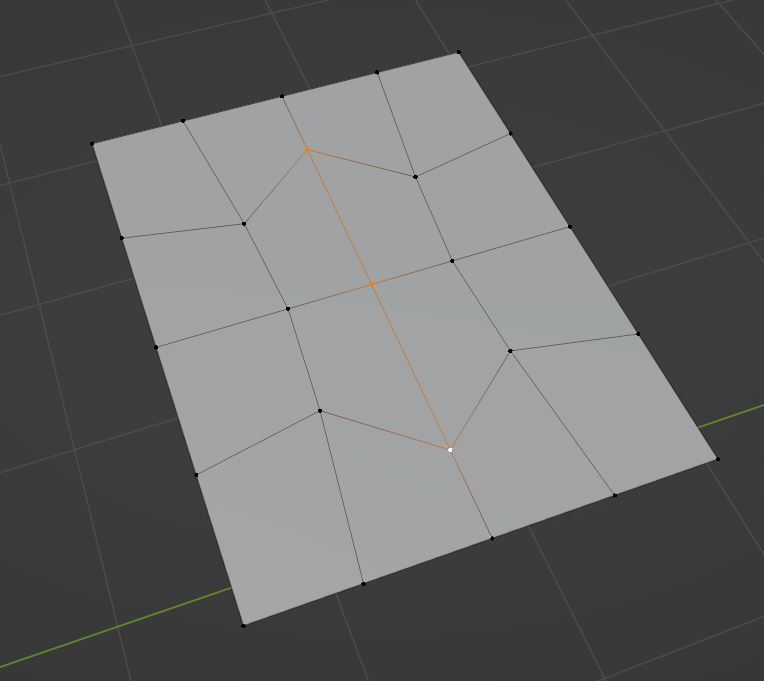
4- You now have cleaner topology than before. You can slide the vertices to get a better edge flow.

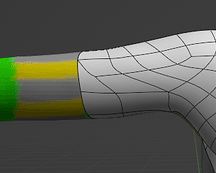
This area seems a bit stretched, with weirdly shaped faces. It’s too early to tell for sure if it will be a problem, but it should be watched after you make more of the arm.
2 Likes