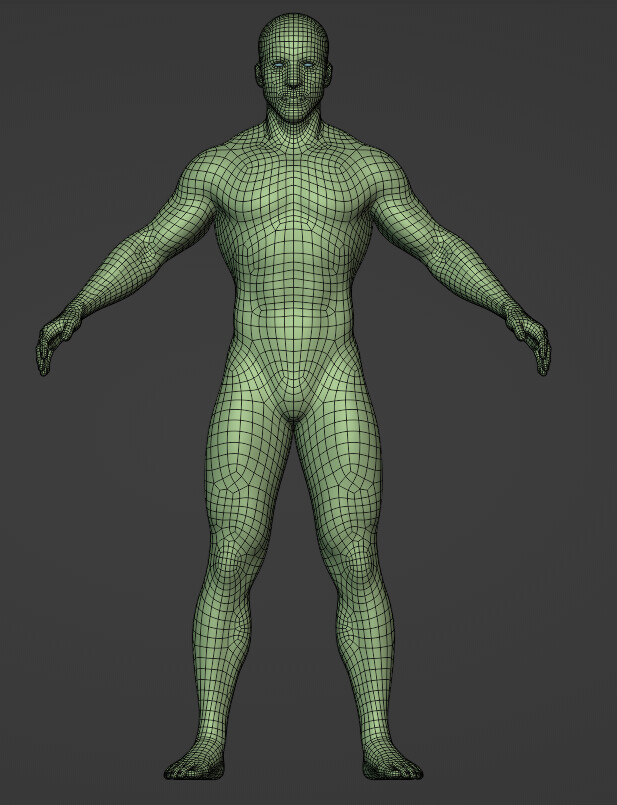
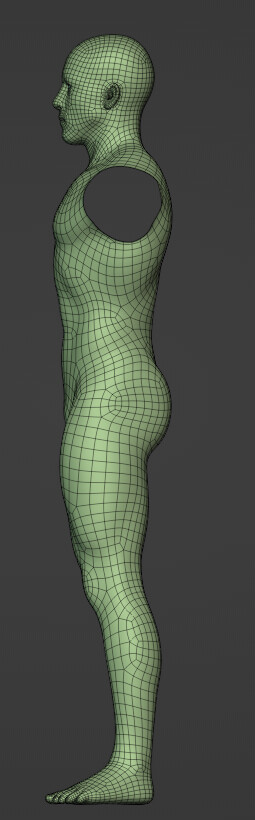
Hello, I’ve retopologized a human model, is this acceptable? The head is messy, I’ll try to fix up the edge flow later.
Thank for your time!
Hello, I’ve retopologized a human model, is this acceptable? The head is messy, I’ll try to fix up the edge flow later.
Acceptable for what purpose?
Thanks for your reply, I thought it’s just either as a statue or for animation, are there any other purpose?
Those are about it, but the topology for animation is very different than for a static pose ![]()
Thanks! I guess mine isn’t suitable for animation then. How should I improve it?
Hello !
On the overall it can work , it’s not perfect but not a tragedy either…
The face might need more work but it’s hard to judge on the screenshot.
On the overall, to sum up, the topology flow should highlight muscles, so when it’s deformed it’s possible to add creases there.
In some cases you made that, in others you just messed the topology to probably even the polycount, and even the loop’s vertices number in some places.
In the end , it’s probably possible to take your model, rig it , and make some animations and the result should work, but if you want to add some muscle details or try to do highly realistic deformation on close up shots the topology is going to get a bit in the way.
But for general cases from a distance it should work.
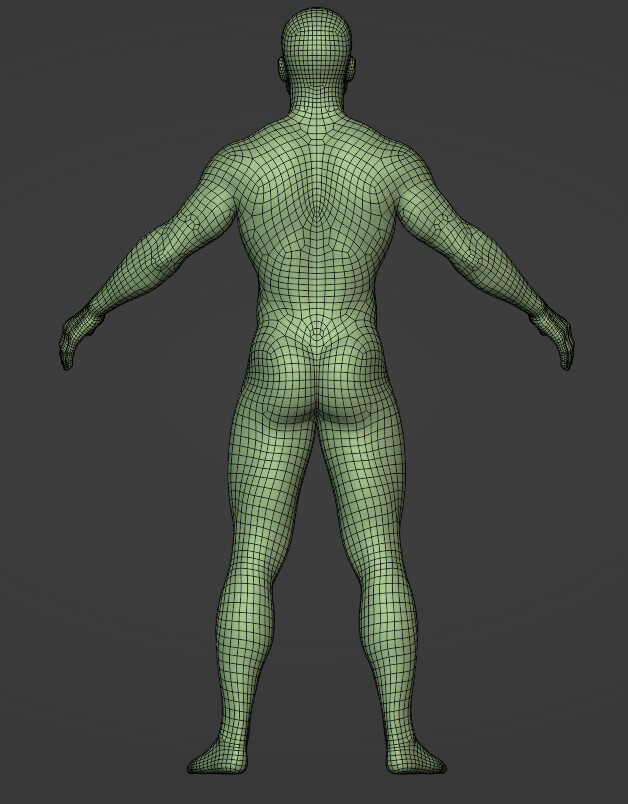
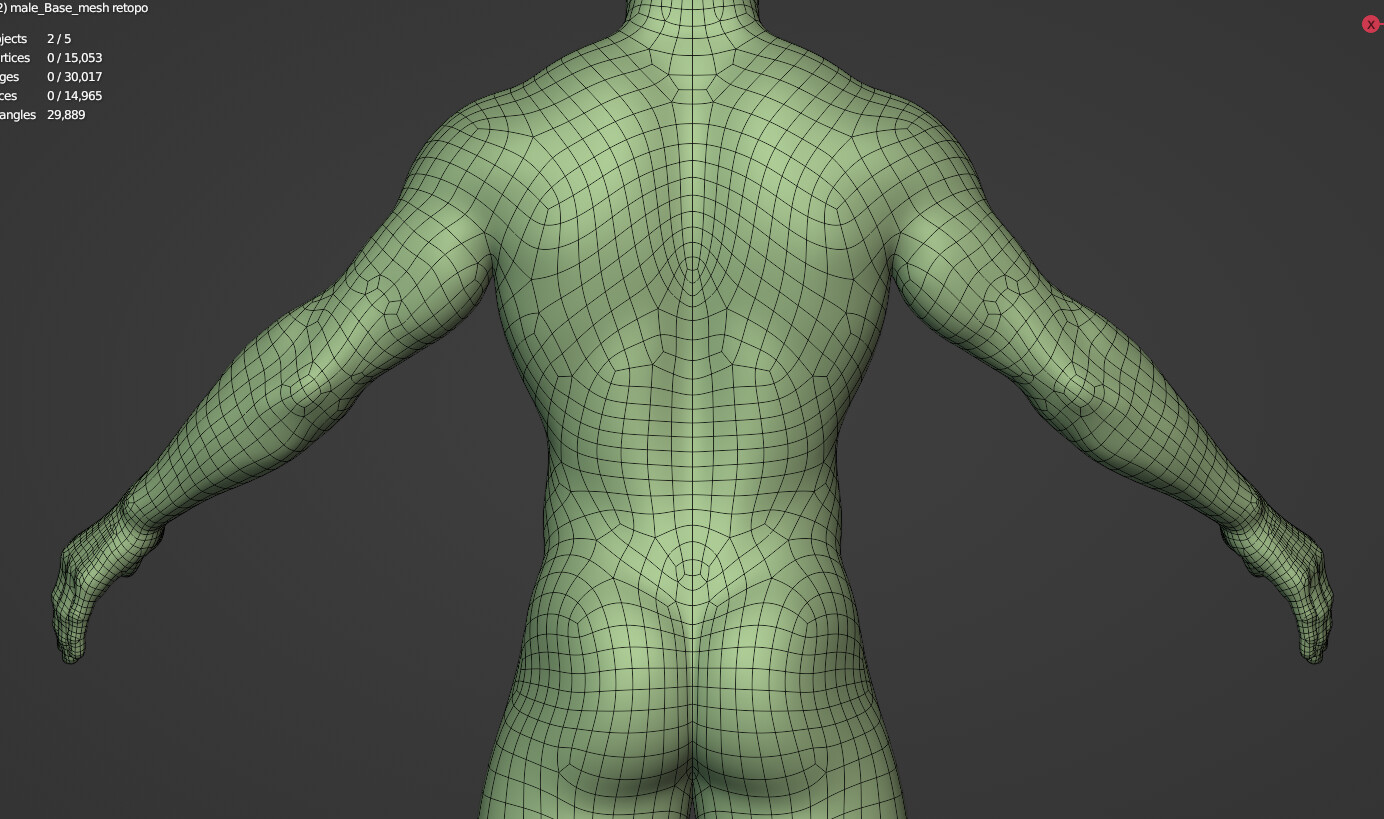
Basically it give the impression that you started with the front and finished with the back where there is much more weird topological decisions there.
Finally, the face is probably going to need more work since it’s the area of focus and it deforms a lot.
Maybe the best way to see how it works is to take your model and try to make facial expressions and poses with it, you are probably going to get a better feel of what is missing or what is difficult to do with the topology.
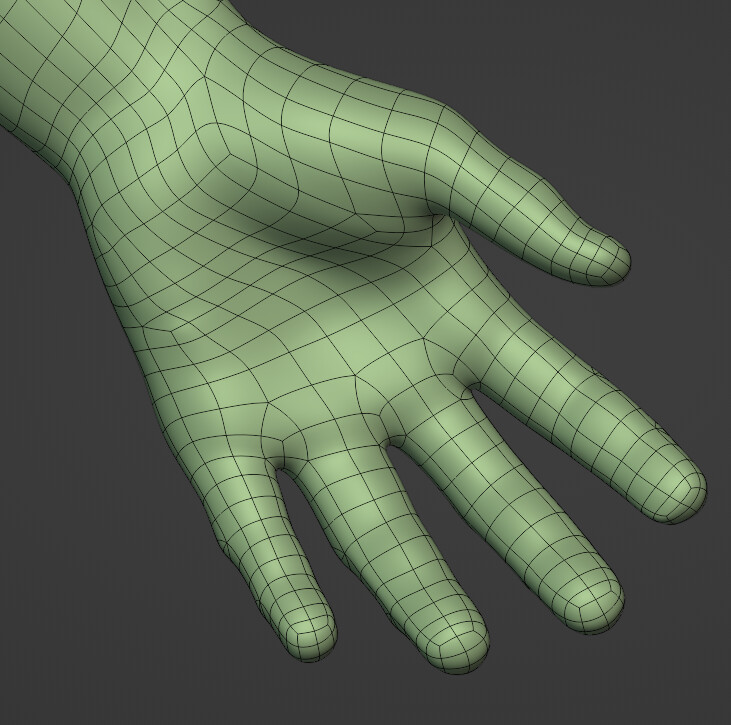
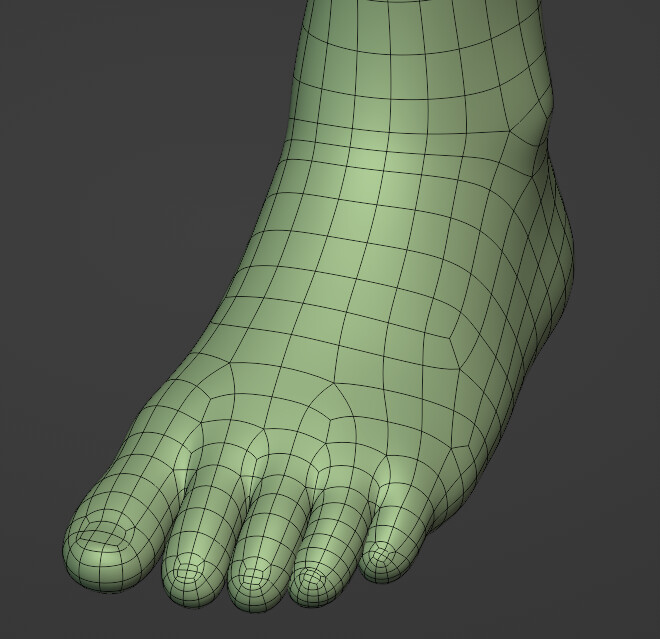
Something else that I recommend if you really want to become really good at that is to study parts individually.
Like one day to take a hand, and study different models, and try to make a nice retopo, then you can take a arm, a leg, a chest, a face…
Once you are satisfied with all that you can look into a full body.
I also recommend to study Chris Jones work : https://www.youtube.com/watch?v=ueYtM2KprqY
There is a thread here : Human Progress
What is really cool is that he uses very light polycount and yet manage to put all the needed detail, maybe that’s another way to improve your models :
Try to make the simplest topology first, and then add only the necessary missing details if any.
What makes Chris Jones’s work really great is that he uses some displacement maps, shape keys and rig tricks to add layers of details and muscle deformation on the mesh. That way the topology can stay very simple.
But it’s also possible to add more details in the mesh so it’s easier to add details , but then the topology is harder to maintain…
Hope that helps to give you ideas, practice makes perfect !
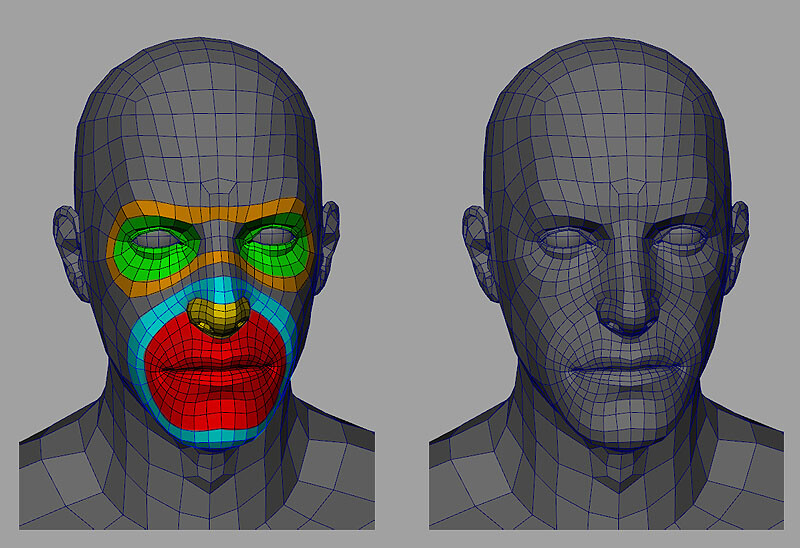
You mentioned wanting to work on the edge flow of your face there. As a general rule, face topology has loops that roughly follow the muscle layout of the human face, with loops around the mouth and eyes, something like this
Thanks for your advice!
I barely know anything about human anatomy, definitely must learn more about it. I only think about conforming the topology along the surface to the best of my ability, not thinking about how they actually appear when deforming.
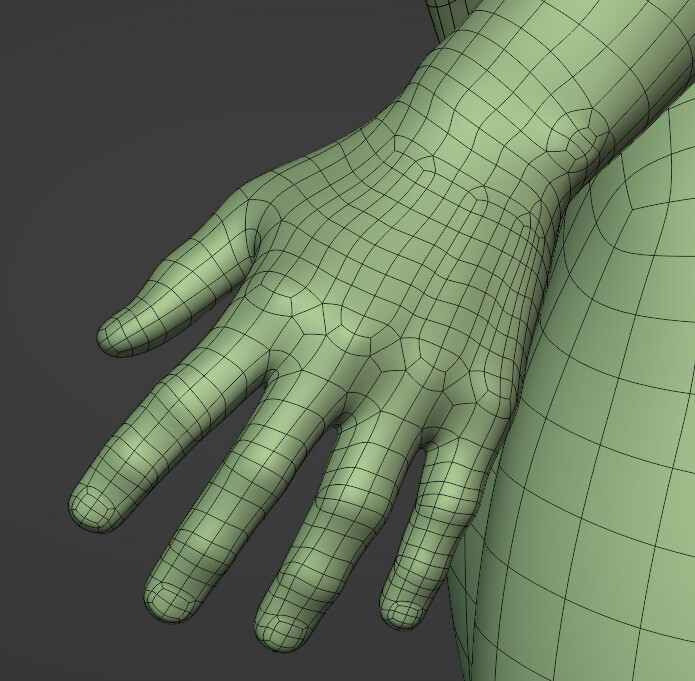
I afraid of any flow with self intersection (except the hand, I just noticed it) and tried very hard to not let that happen, that probably caused me to mess up in some area.
Actually the back is where I started with and always tried to think about how the flow will go along the body, to the front, to the arm and to the legs, how they’ll go without intersecting while conforming the surface? And they’re coming down from the head as well, confusing.
Anyway, thanks again for your help!
This’ll definitely be useful. Thanks man!
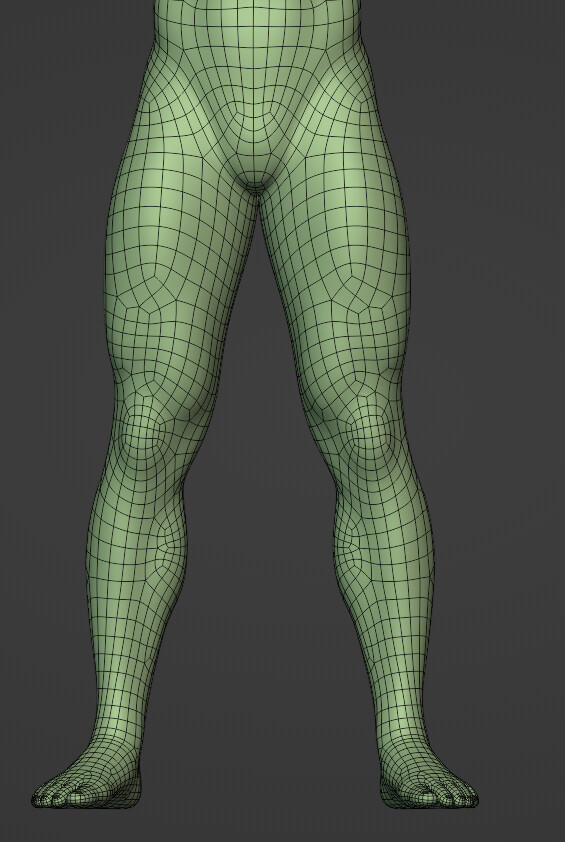
When it comes to topology for animation, generally speaking, the simpler it is, the better it would be. Especially for the limbs (arms and legs), make sure they have basically a tube or cylinder topology. There should be no weird loops (I know you make them to achieve more realistic form), because those weird loops will be a problem later.
One big advise though, and most people will wonder if it’s true, have the palm of the hands face forward instead of downward. It’ll save you a lot of time in the future.
How so? I ask, because I model and rig in an A pose, with the palms facing down, because I consistently get better deformations that way (For OP, this is personal preference, modeling/rigging with the palm out is not inherently bad or anything like that). But I have rigged a model or two for other people who wanted the palms facing out, and the speed of the rigging and weight painting were about the same.
Starting with the palm down technically saves me time in animation, because most of the time the characters start out with their hands pointed down, rather than out, but it’s not enough of a time saver to recommend one over the other.
I would point out, that with the hand pointing down, the topology of the forearm generally has a twist to it.
Well, because that’s the normal rest state of the hand in the first place.
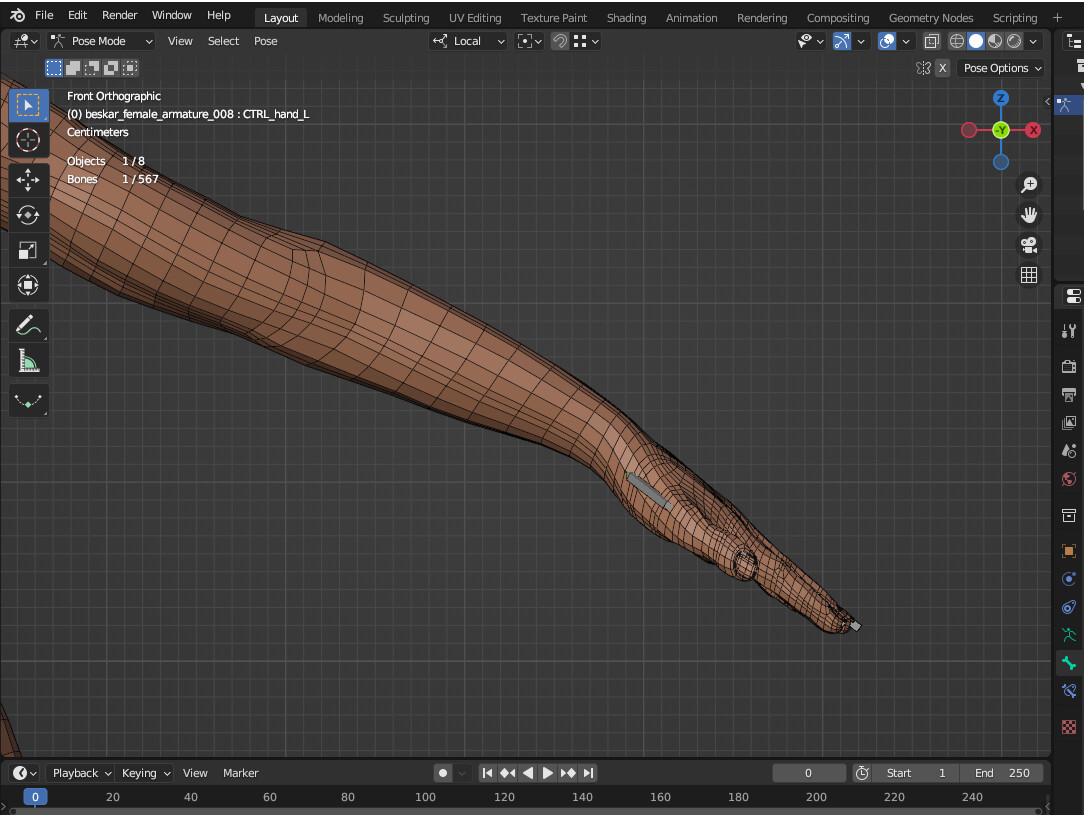
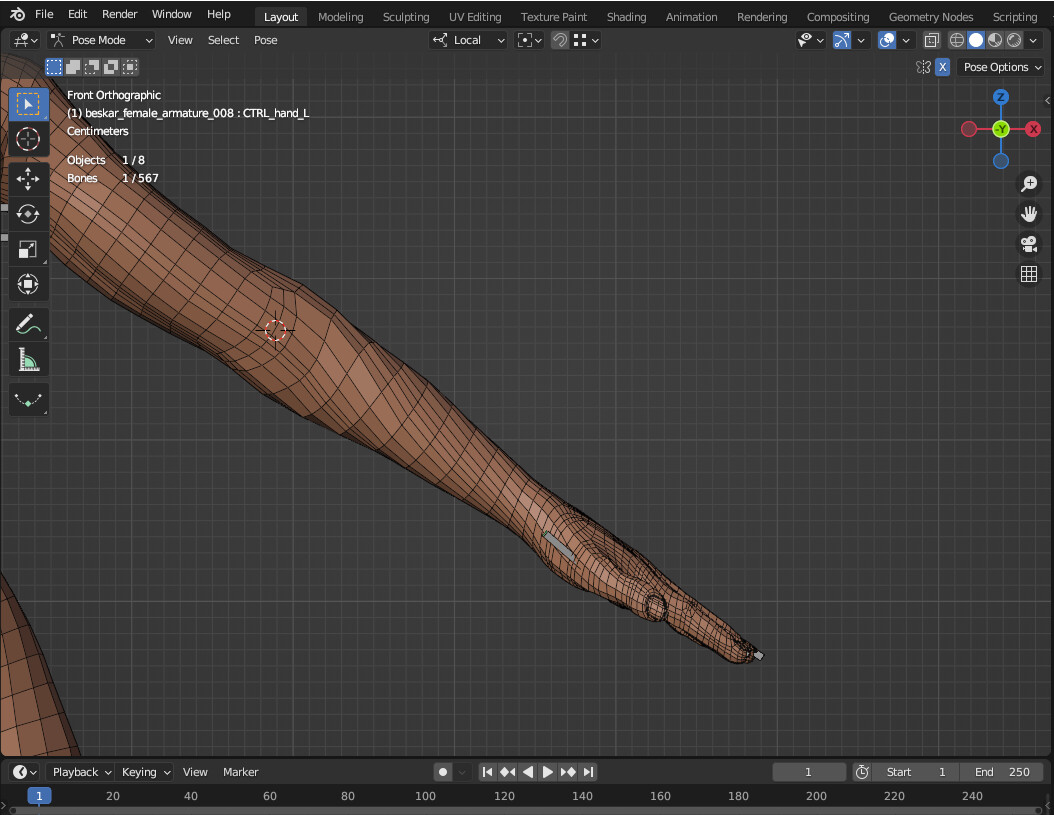
The thing is, if one models with the forearm twist in mind, it wouldn’t be a problem. But for most people, they model the forearm straight, but with the palm facing down, which will look something like this:
The problem with this, when you twist the arm back to its rest state (palm facing forward), it will deform pretty poorly:
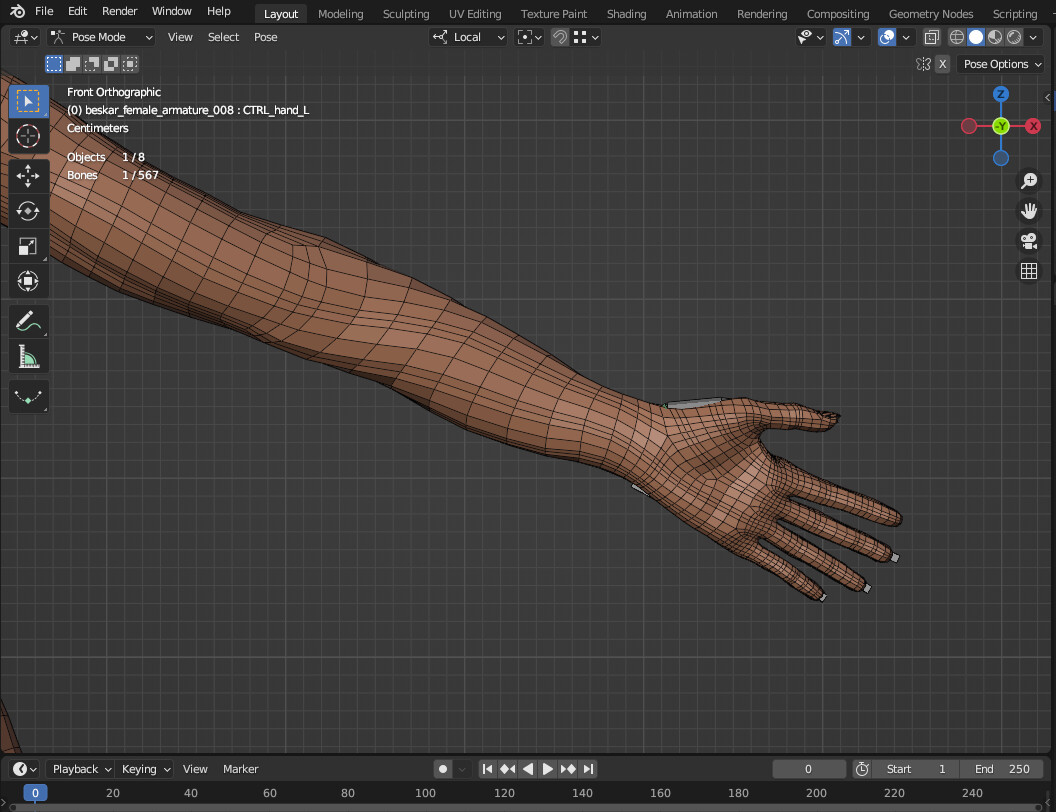
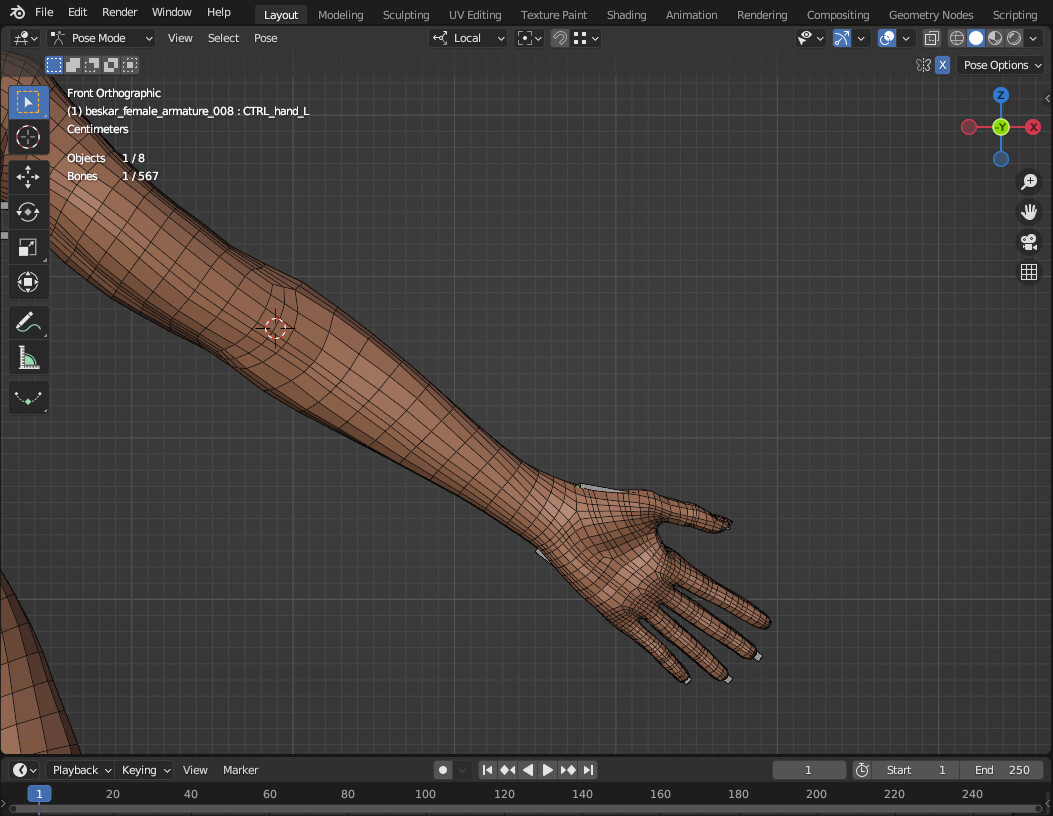
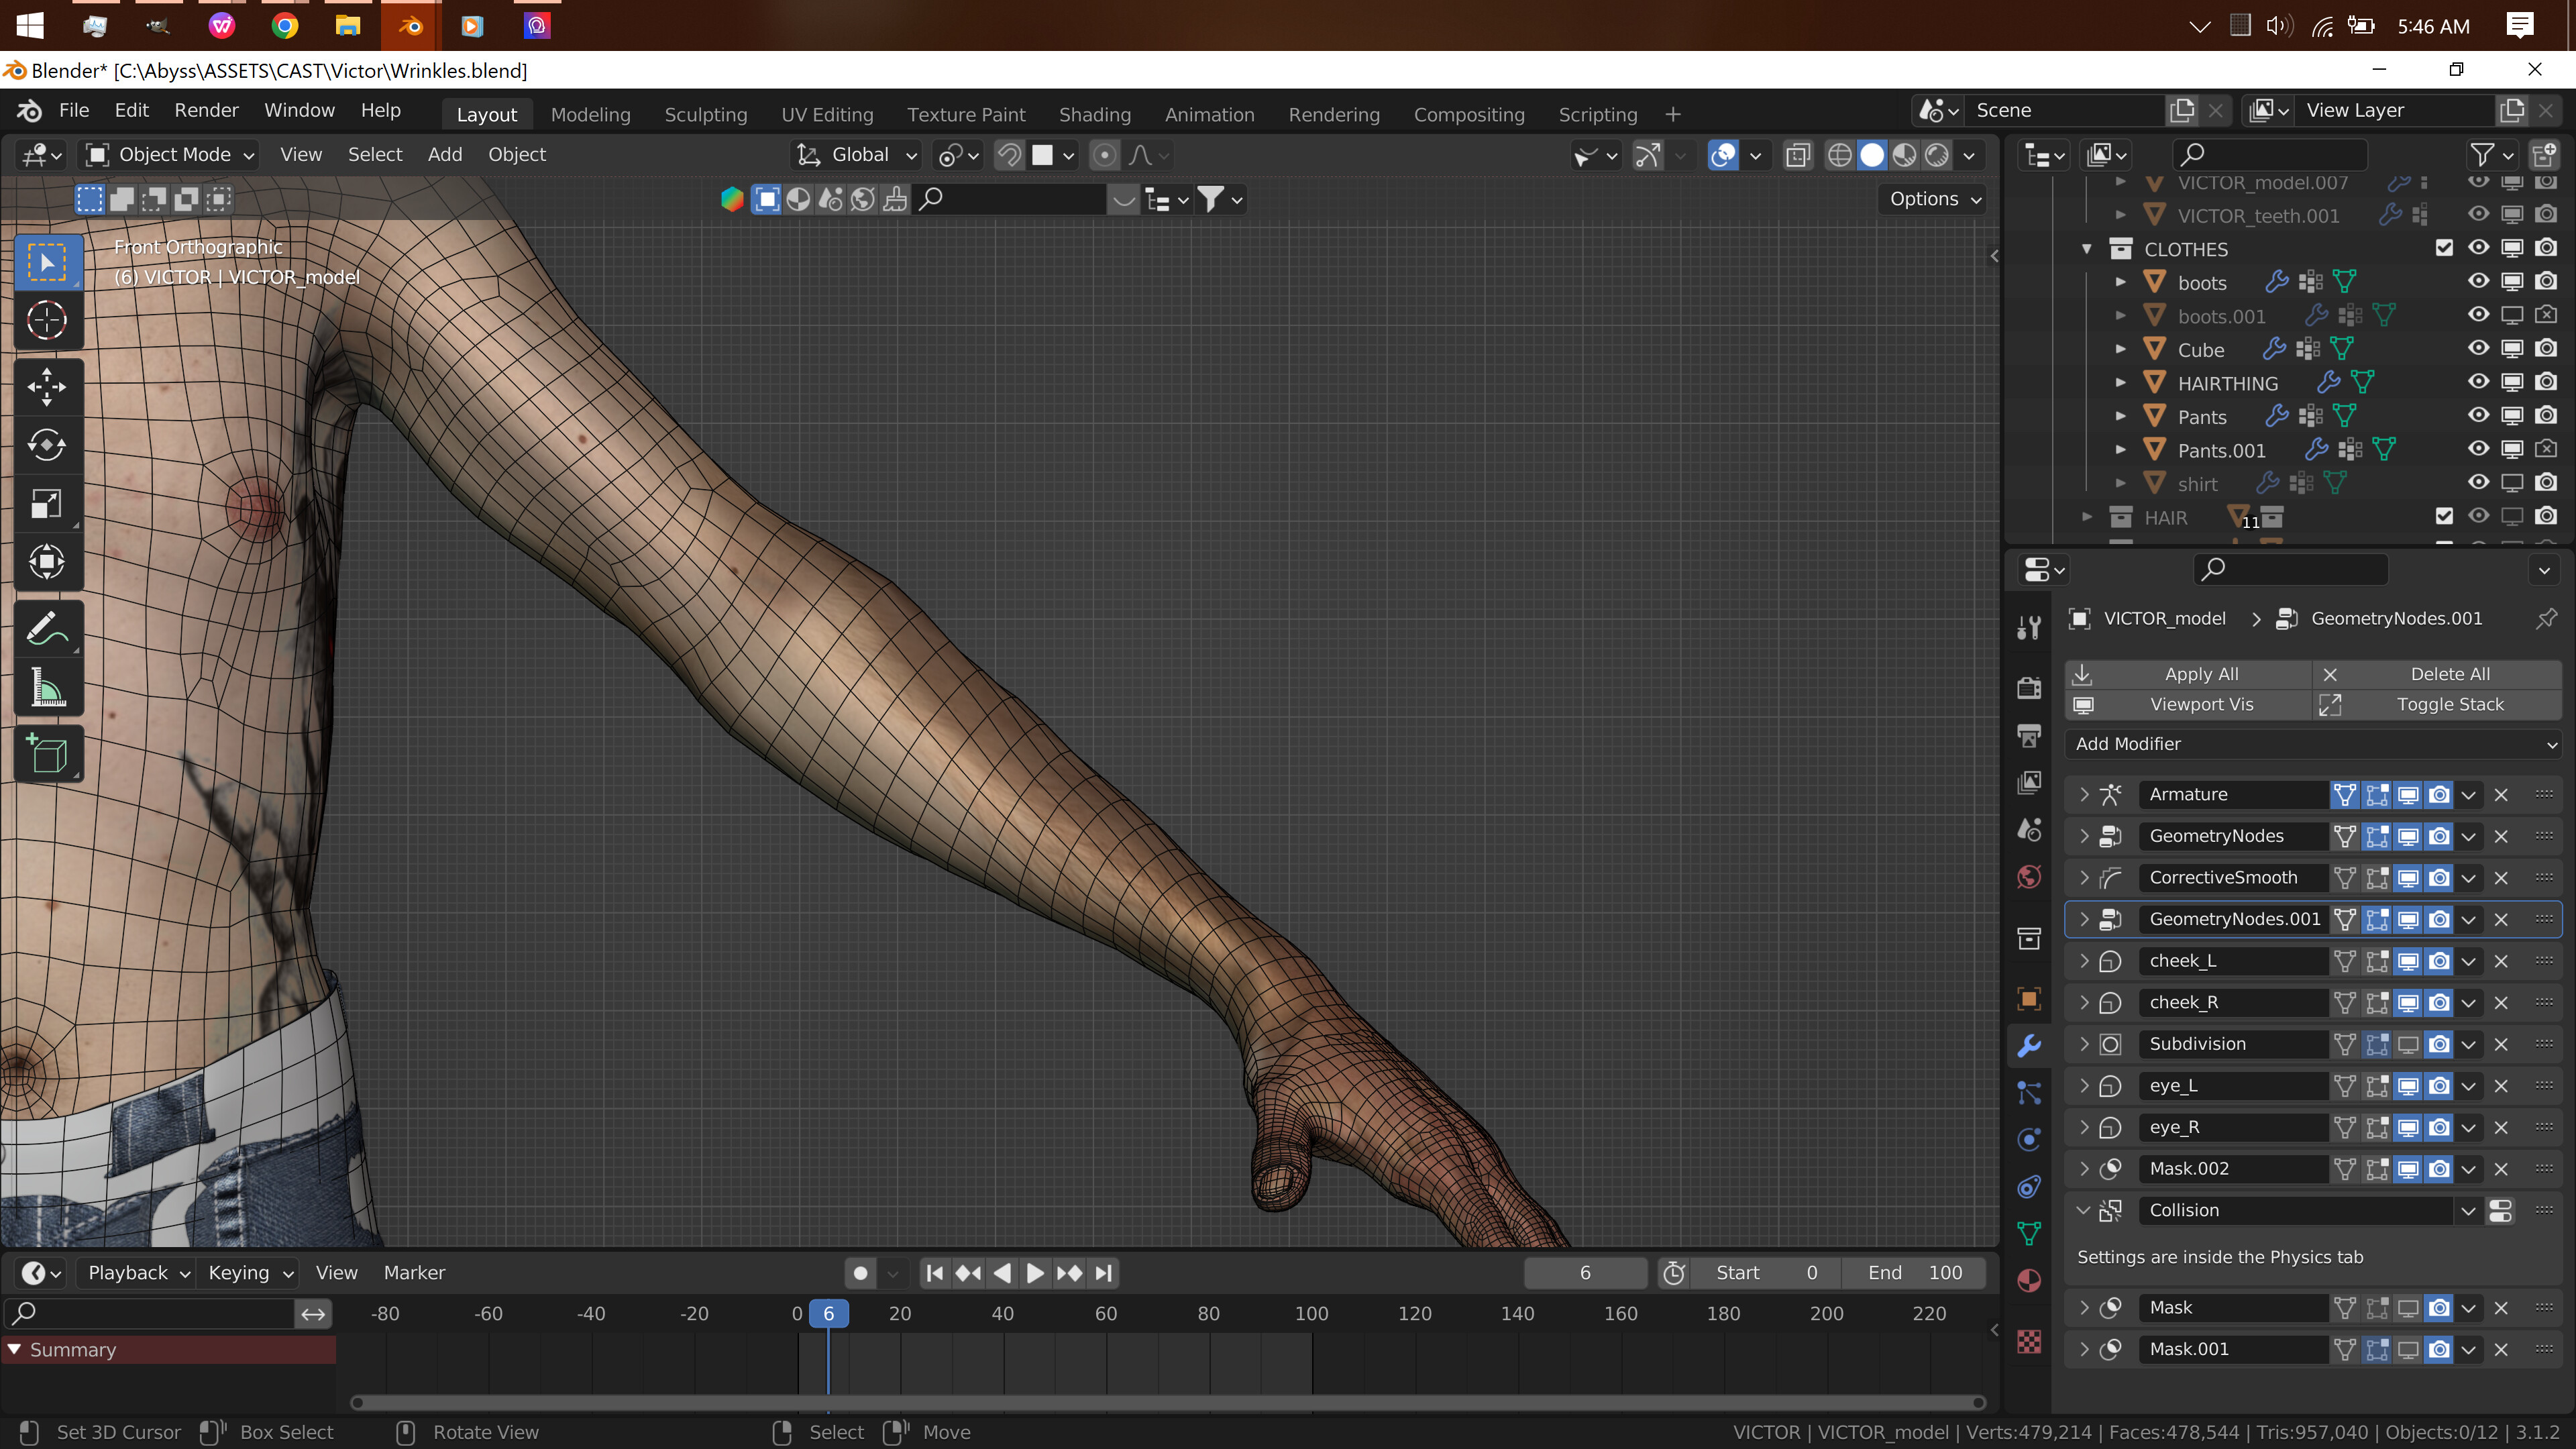
Meanwhile, when you make the model to have its palm facing forward, in its rest state it will look like this:
And when it’s supinated (or twisted), it will just look more natural:
To be honest, I don’t really know what’s the origin of palm facing down or when did it start in 3D. It’s still one of the things that baffles me to this day.
Give it a try, and you might as well wonder yourself.
The palm facing out towards the front? I’ve seen 3d models that use that as the rest pose, but not many real people. Casual observation would lead me to believe the natural “default” standing pose of IRL people is with the palms pointing in towards the thighs. But I’ve hardly seen all people, so maybe there are a significant number that stand with their hands pointed out as (I think) you’ve suggested. ![]()
I don’t know about that. I taught myself to model, and most tutorials I followed taught the “palm down, twist” method. When I took a course on organic modeling in college the professor (A retired professional 3d generalist) taught the same thing. There are definitely people that don’t add it when in that position and get poorer deformations as a result, but I think the solution to that problem is less “model with the hands out, all the time” and more letting people know “If you model with the palms down, add a forearm twist, if you model with the palms point out, don’t”
Yep, if you model without a forearm twist with the hand pointing down it will deform pretty poorly when put into a palms out position. That’s why, given the position OPs model is already in, I recommended adding the twist.
Your pictures Illustrate what happens when the forearm is modeled without a twist (from either starting position) very well. But the whole “If it starts out untwisted with the palm out, it twists when the palm is pointed down” also works in reverse: “If it starts out twisted with the palm down, then it will untwist when the palm is pointed out”
I’m still pretty sure that the palms down thing started because it’s closer to how IRL people hold their bodies, but I could be wrong. I tried looking it up, but I got a whole lot of “it’s down to personal preference”, why T pose isn’t great, and references to medical conditions that affect the wrist, which was less than helpful.
I have tried both. Years ago, after I learned the basics of modeling but hadn’t definitively settled on my standard approach yet, I noticed some people modeling palms out, and tried it myself. That’s how I know I consistently get better deformations when starting with the palms pointing down.
There’s nothing wrong with your modeling method, but I do disagree with presenting it as the best way to model, or a massive time saver, when people can get results just as good, at a similar speed, with the palms down method, as long as they’re aware of the forearm twist and when to use it.
I don’t want to hijack the thread with a lengthy disagreement over what comes down to personal preference, so I’ll leave it go here.
TLDR for OP: If you want to keep your palms pointing down, you probably want to add a twist to your forearm topology, it helps with deformations. If you want to keep it straight, you probably want to twist the hands so the palms are pointing out. Just keep in mind your dude’s pretty muscular, and pointing the palms out will shift those muscles, changing the shape of the forearm a bit.
Hmm… AFAIK the simplest standing pose (real or game) is not something like this ( mountain pose from https://www.northshore.org/mycommunity/yoga-meditation/ ):

Maybe that’s the reason why this “well known” site (Wiki PolyCount) refers like so to standard base meshes ??
Thanks so much for your help guys!
Yeah, as said, the overall impression I got from the body is that with some proper rigging it will work in many cases. It’s already an achievement in itself.
But in the other hand it can be made a bit simpler if it’s not needed for super fancy stuff, or it can be tweaked if you want to use the model in more extreme situations.
Maybe at some point make a post about one aspect of the model, like only the hand , only the face… And it might be simpler to focus on one area at a time and provide more precise feedback !
Good luck !
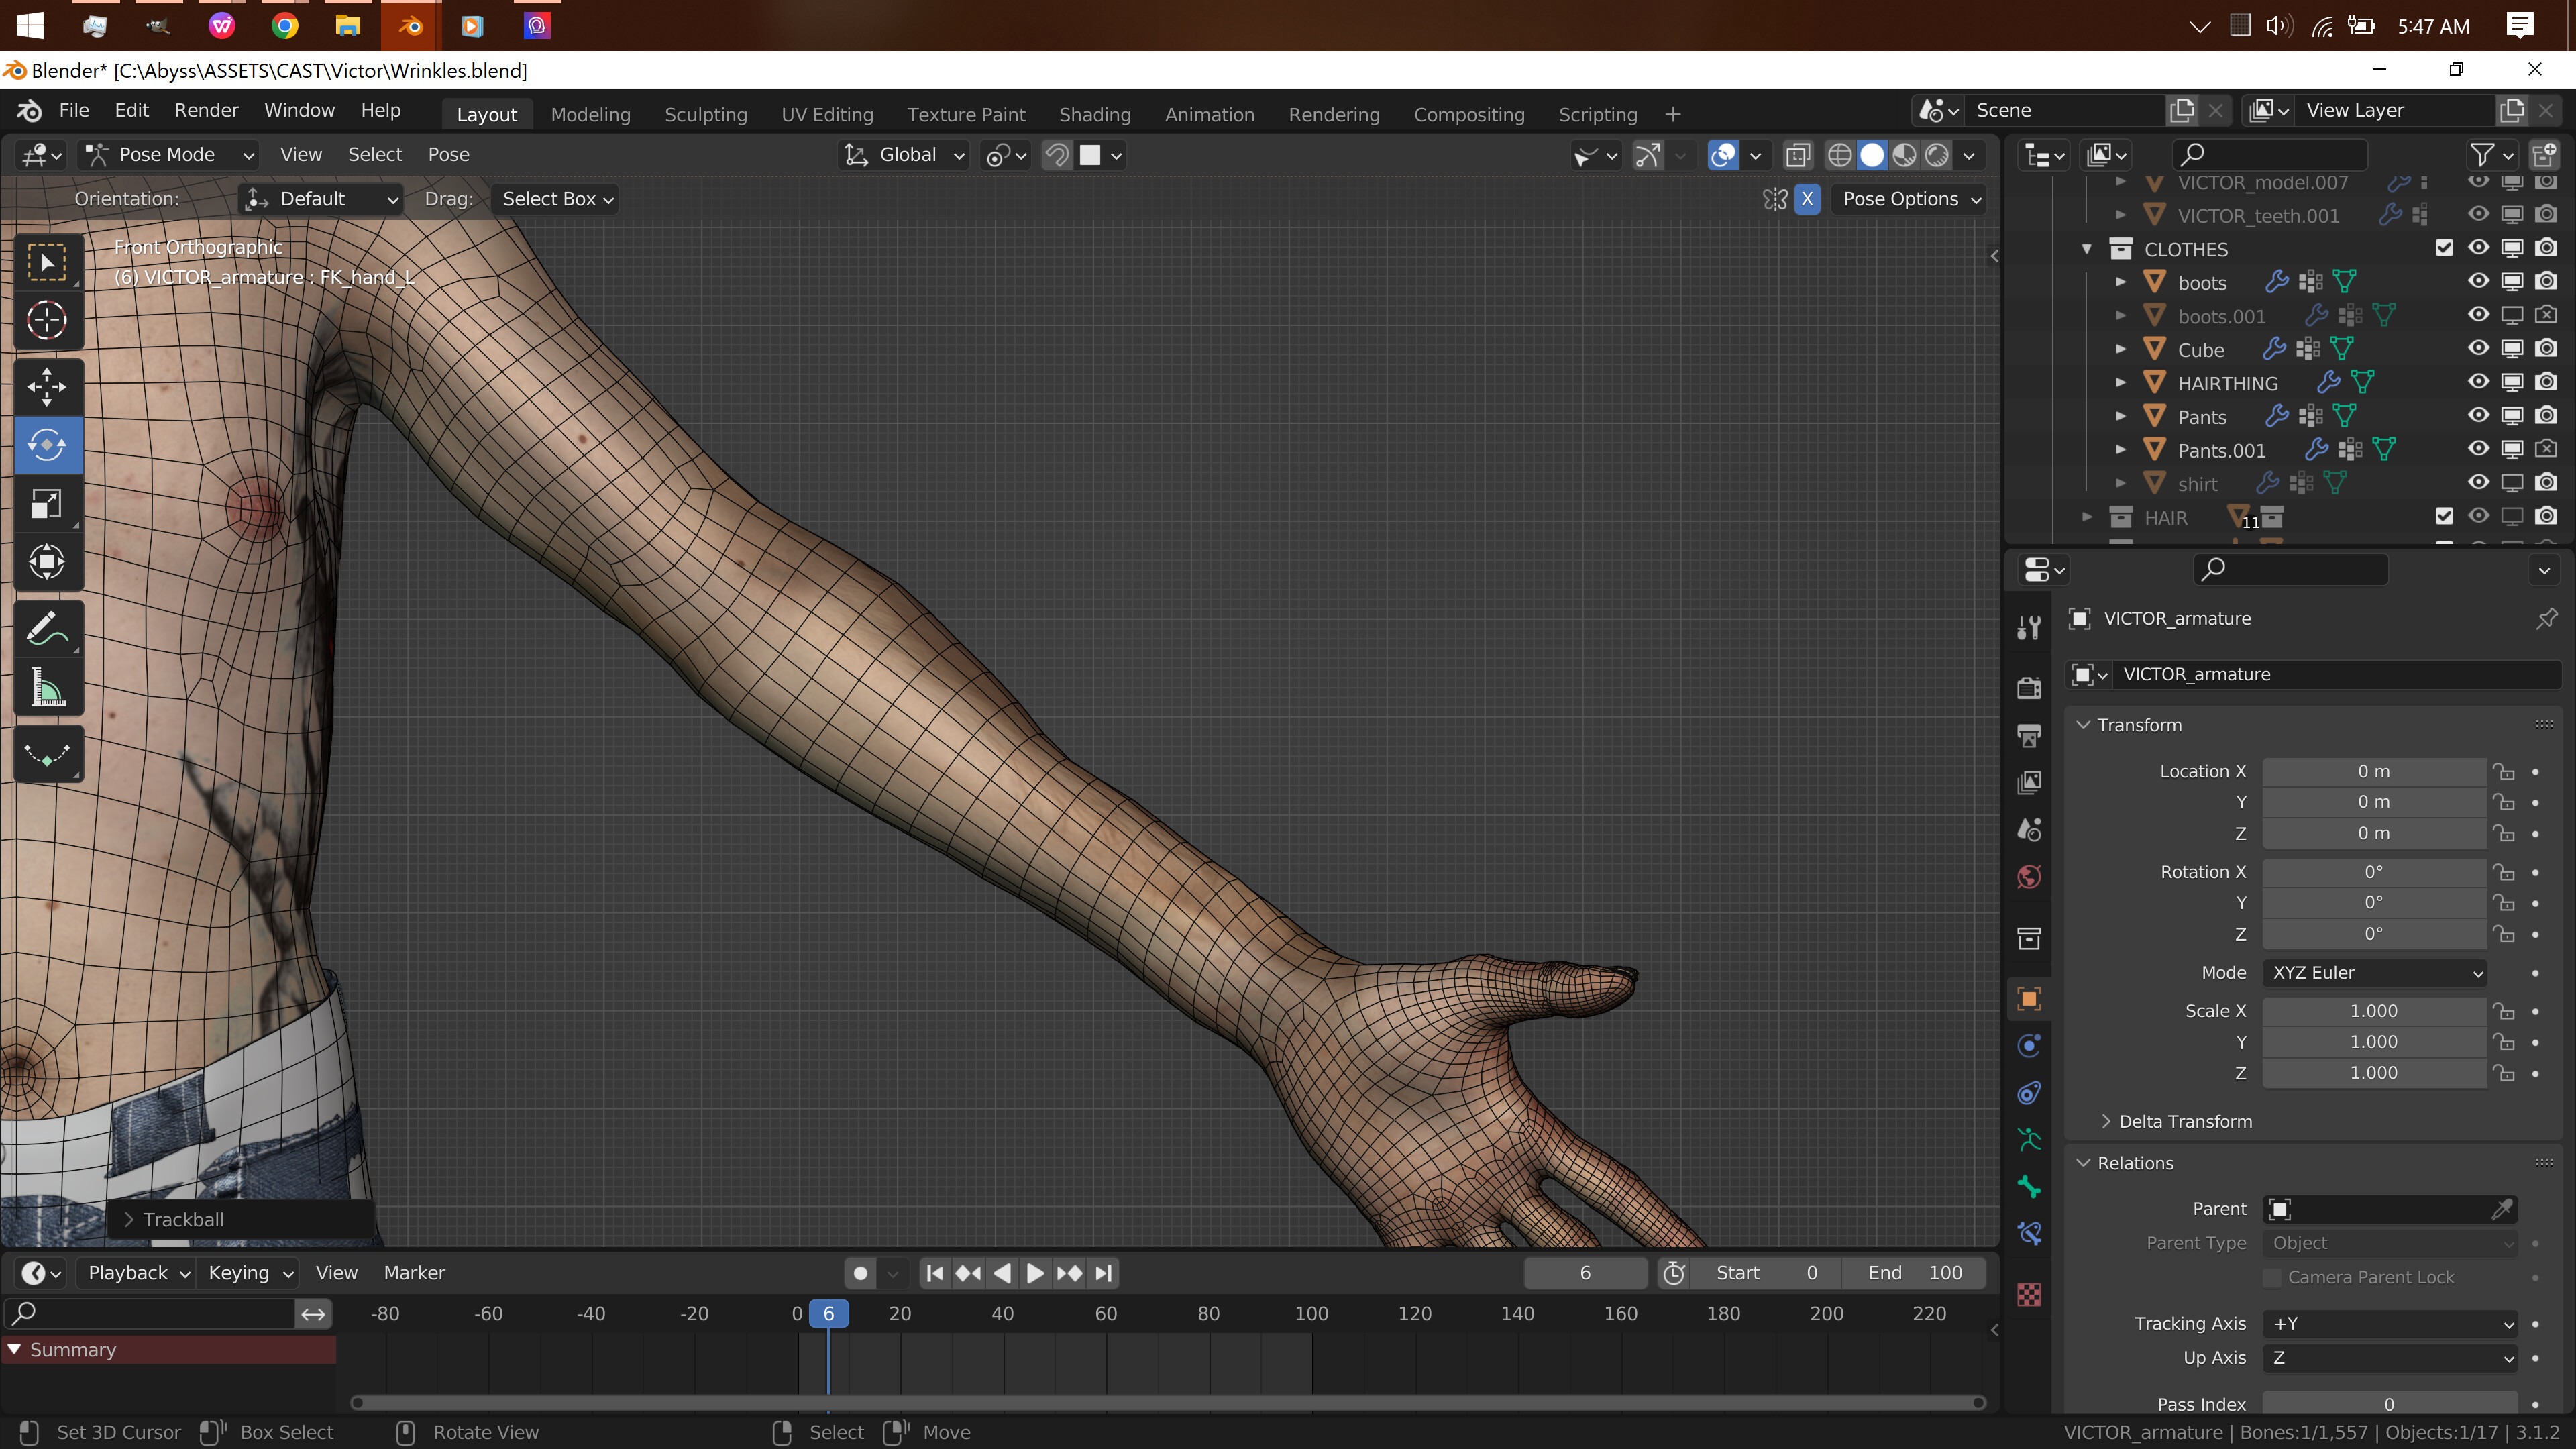
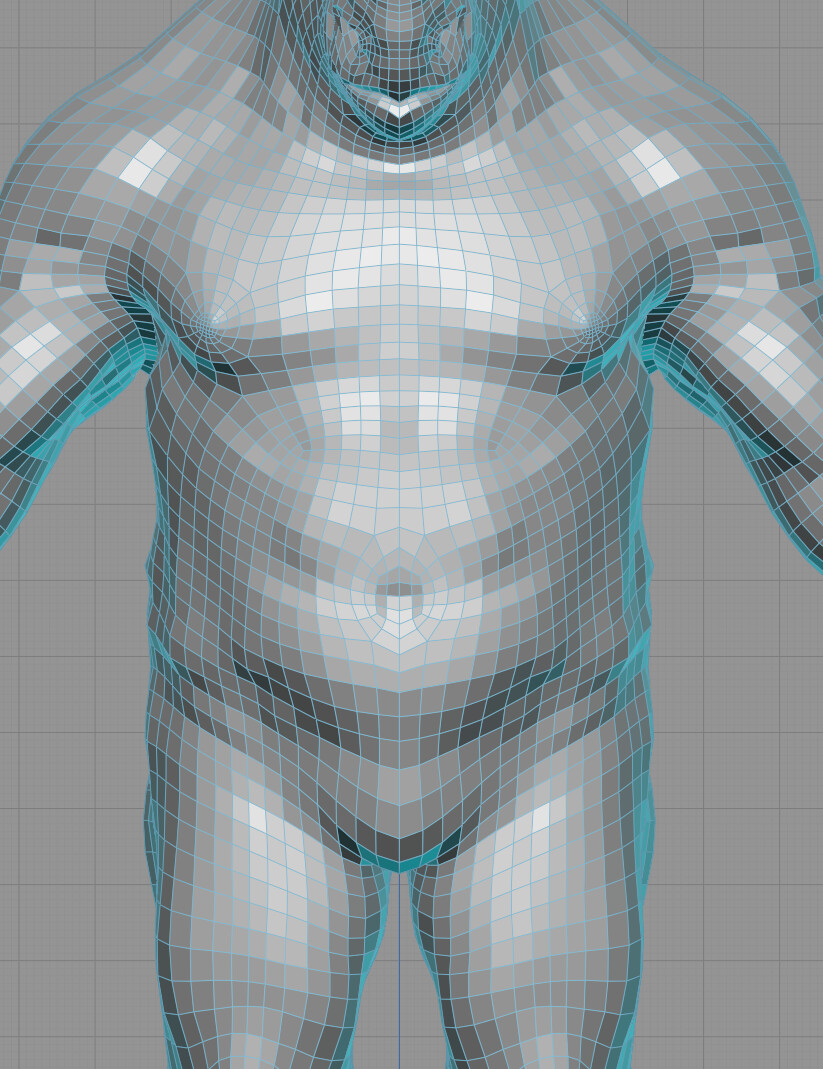
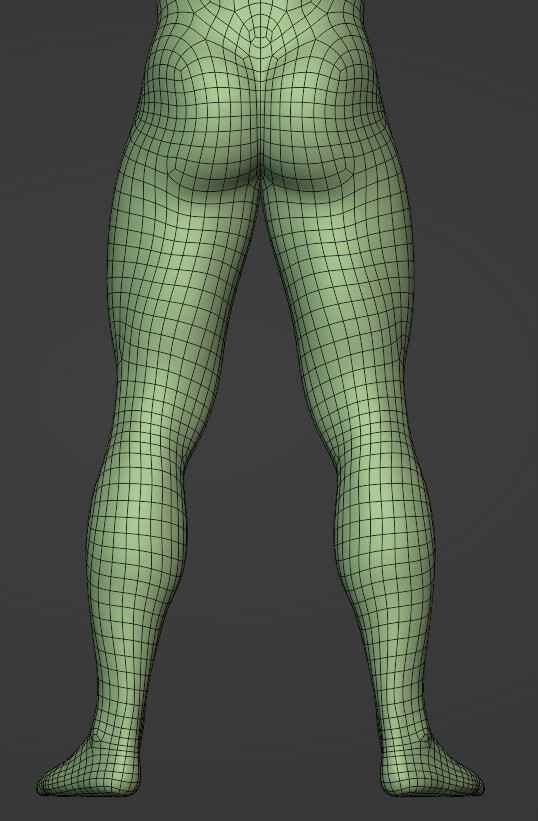
@Light_Dark For the torso I think you can simplify the geometry to just be straight quads going down the whole way to the buttocks and thighs. The back does not need all those complexities. Having the quads from the shoulders go in towards the mid section is going ro cause a lot of stretching and dense geometry once you subdivide it. Not fun to sculpt on or animate with.
Here is an example of how you could construct the flow of the torso. My example is not perfect (going to optimise the model some more), but the basic idea here is the same.
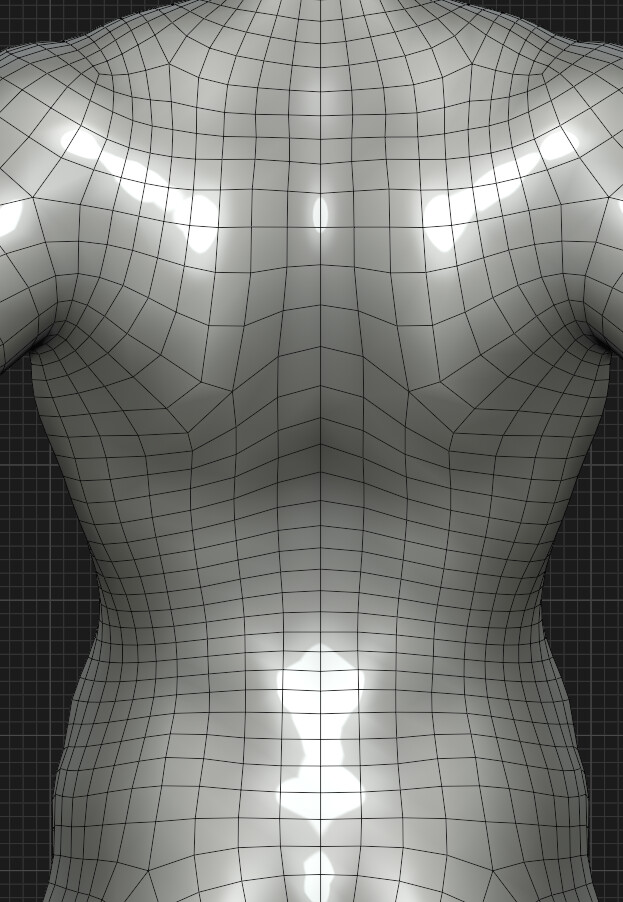
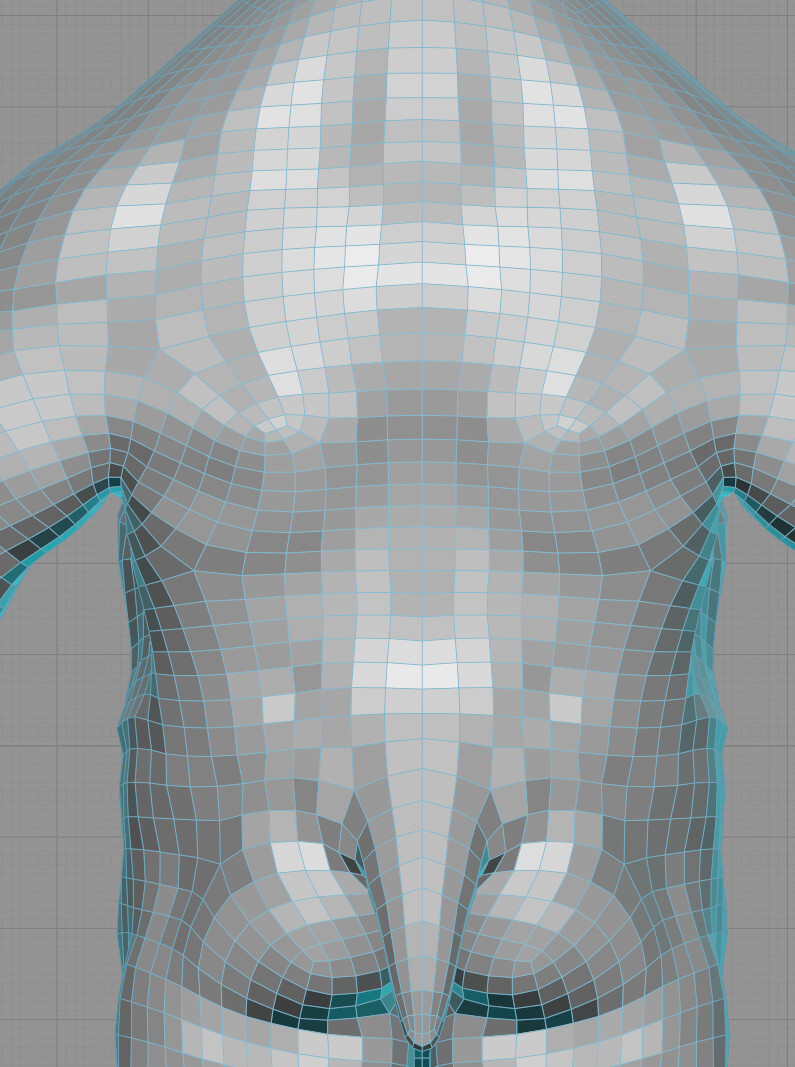
Here is another example of how you can make the torso topology flow from a different type of model I am currently working on.
Remember, these aren’t the only solutions and even in my examples here there could be some additional optimisations. Depending on how detailed your model is and how much geometry you have available for your production budget you can have different topological flows. It’s all about problem solving by finding the simplest solutions that do not overcomplicate the flow of the mesh .