


Recipe courtesy of
Andy Liang
for
Food Network Kitchen
Recipe courtesy of
Andy Liang
for
Food Network Kitchen
Watch how to make this recipe.
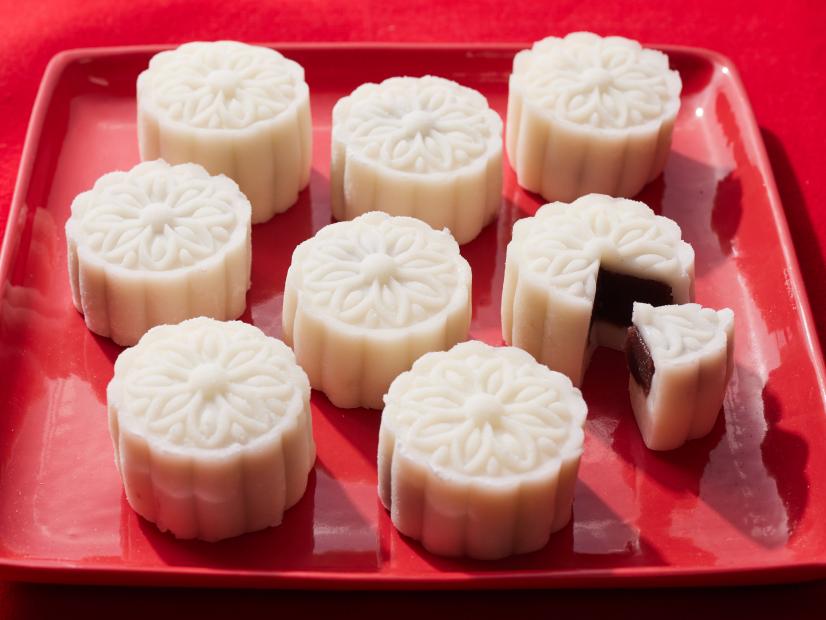
Snow Skin Mooncakes
Getting reviews...
- Level: Intermediate
- Total: 1 hr
- Active: 55 min
- Yield: 12 mooncakes
-
- Nutritional Analysis
- Per Serving
- Serving Size
- 1 of 12 servings
- Calories
- 206
- Total Fat
- 4 g
- Saturated Fat
- 1 g
- Carbohydrates
- 38 g
- Dietary Fiber
- 2 g
- Sugar
- 6 g
- Protein
- 4 g
- Cholesterol
- 2 mg
- Sodium
- 53 mg
Snow skin mooncakes (Bing Pei Jyut Beng) are a soft and chewy mochi-like treat stuffed with a variety of dense, sweet fillings. Sharing mooncakes is an important part of the Chinese Mid-Autumn Festival, sometimes called the Moon Festival or Mooncake Festival. Although the cakes traditionally use a wheat flour pastry, cakes with a rice flour dough that’s steamed, not baked, began appearing in Hong Kong in the 1960s and are now popular in China and elsewhere. If you’d like to make mooncakes at home this is an especially easy version to try. Although these treats can feature a variety of fillings, we streamlined the recipe by using store-bought sweet red bean paste, one of the most popular mooncake fillings, so you can focus on making the snow-like skin. A microwave quickly cooks the combination of sweet rice flour, regular rice flour and wheat starch that forms the soft, easy-to-work dough. The intricate designs stamped on top of mooncakes are easy to achieve with an inexpensive plastic press mold. You can have a batch of beautiful homemade mooncakes ready in about an hour.
- Level: Intermediate
- Total: 1 hr
- Active: 55 min
- Yield: 12 mooncakes
-
- Nutritional Analysis
- Per Serving
- Serving Size
- 1 of 12 servings
- Calories
- 206
- Total Fat
- 4 g
- Saturated Fat
- 1 g
- Carbohydrates
- 38 g
- Dietary Fiber
- 2 g
- Sugar
- 6 g
- Protein
- 4 g
- Cholesterol
- 2 mg
- Sodium
- 53 mg
Ingredients
Directions
Special equipment:
2 1/4-inch-wide mooncake press mold- Whisk the confectioners’s sugar, wheat starch, rice flour and 1/3 cup plus 1 tablespoon of the sweet rice flour together in medium microwave-safe bowl until combined. Add the milk and vegetable oil and whisk until smooth. Cover with a microwave-safe plate. Microwave on high, stirring every 30 seconds with a rubber spatula, until a translucent dough forms, about 2 1/2 minutes. Stir once more and set aside, covered, until cool enough to handle, about 20 minutes.
- Toast the remaining 5 tablespoons sweet rice flour in a small nonstick skillet over medium-low heat, stirring constantly with a rubber spatula, until the flour starts to smell fragrant, about 2 minutes. Transfer to a small bowl and set aside to cool.
- Meanwhile, scoop the red bean paste onto a plate, making12 equal mounds (about 1 heaping tablespoon each). Chill in the refrigerator until needed.
- Lightly flour a surface with the toasted sweet rice flour. Place the dough on the surface and knead until smooth, about 1 minute. Divide the dough into 12 equal pieces and roll each into a ball. Cover the balls loosely with plastic wrap.
- Dust the surface again with toasted rice flour and dust your hands with some as well. Working with 1 dough ball at a time, firmly press it down into a 3-inch round about 1/4 inch thick. Use a small rolling pin to roll the edges out (leave the center untouched) until it’s 4 inches in diameter. Place a portion of the bean paste in the center of the dough and pull the dough up around it, enclosing it and pinching the edges to seal.
- Use a pastry brush to lightly dust a 2 1/4-inch-wide mooncake press mold with some of the toasted rice flour. Lightly tap off any excess. Place the assembled cake in the mold seam-side up. Turn it upright on your work surface. Press the plunger down until you feel resistance, then lift the mooncake mold up and use the plunger to carefully press the mooncake out. Dust off any visible rice flour with a pastry brush. Transfer the cake to a serving platter and repeat with the remaining dough and bean paste.
- Enjoy the cakes immediately or refrigerate them in an airtight container for up to 3 days.