Macrame for beginners
Do you want to learn macrame knots? But you have no idea where to start? We explain what macrame means and what you need for it. We will also show you the 4 most important basic knots for your macrame project:
1. Larks head knot
2. Square knot
3. Half square knot / Spiral
4. Wrap knot
Once you master these basic macrame knots, you will see that it is pretty easy. You can then use this knotting technique to make pretty jewelry and beautiful home decorations.
What is macrame?
Macrame is a knotting technique for making ornaments, textiles, or jewelry. It is an artisanal technique in which threads are knotted by hand and a pattern is created. In order to determine a pattern, you should know which macrame knots there are and how they are performed. You don't know the square knot nor the half square yet? No problem! We will explain the basic macrame knots using uncomplicated examples.
What can you do with macrame?
Macrame is used in the design of jewelry and home decorations. Your basic knowledge will come in handy when making knotted bracelets. Macrame bracelets are popular and a nice addition to your other bracelets. Macrame bracelets also often have a slip knot which fits many wrists.
Watch video: macrame knotting techniques with slip knot
Making a macrame keychain is definitely fun! These amazing keychains are made with a beautiful macrame pattern. Macrame keychains are an extremely creative DIY project, and of course they can also be combined with beads.
Another trend is macrame home decorations. Plant hangers, wall tapestries, cushions, dream catchers, etc. There are so many pretty, practical, and meaningful macrame projects out there, that’s why it's so much fun to learn the basics.
Which yarn for macrame?
There are several options when choosing the right macrame yarn. Depending on your macrame project, there is a number of things you should consider. For a macrame bracelet you need a thinner thread than for a macrame tapestry. For bracelets, choose a thread of 1 - 2 mm. If you want to make a macrame tapestry, choose a thicker thread of 3 - 5 mm.
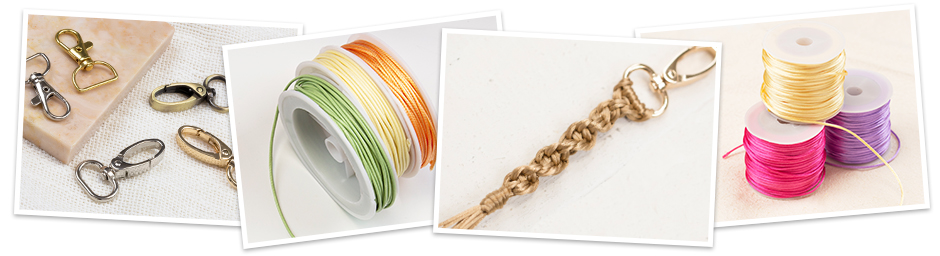
Macrame cords suitable for bracelets:
Waxed cord
Nylon cord
Satin cord
Macrame cords suitable for tapestries and plant hangers:
Cotton cord
Knitting yarn
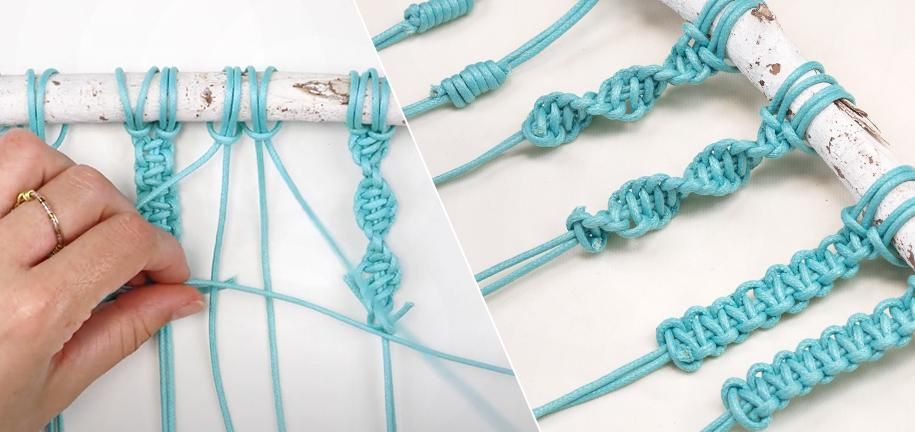
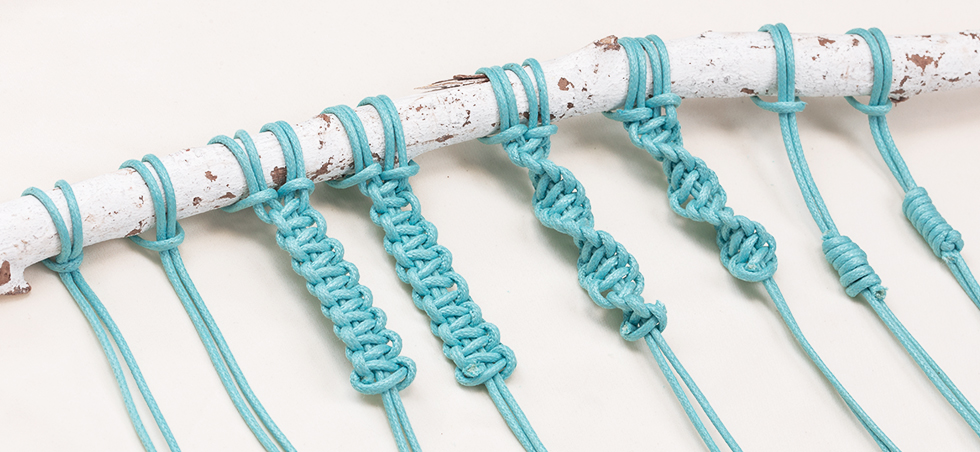
Macrame basic knots
Macrame consists of a number of different basic knots, which we will now briefly discuss. Curious how you can apply them yourself? Watch the video below for clear instructions!
1. Larks head knot
We start with the larks head knot, also known as a mounting knot. This simple knot is often the base knot for your project. You attach the string to an elongated object like a rod. From here you can continue with any macrame knot.
Fold your string in half and place the resulting loop under the rod. Bring the loop down over the rod, thread the two cord ends through the loop and pull tight.
2. Square knot
The next basic knot is the square knot. A square knot is one of the most important macrame knots and can be knotted facing left or right. Don't be put off by this knot. Once you master the square knot, it's quite easy.
Start with 2 larks head knots side by side. Take the left cord and put it over the two middle cords and under the right cord to the right. Now take the right cord and bring it under the middle cords and over the left cord to the left. Now pull on the two outer cord ends to create a knot.
Then take the right cord and put it over the two middle cords. Pass the left cord under the two middle cords, then tighten both cord ends again.
Repeat these alternating steps to create the square knot.
3. Half square knot / spiral
This knot is a half square knot but with - literally - a twist. Using a different type of knot, the half square knot creates a pattern that THEN resembles a spiral. This knot is therefore also known as a spiral knot in addition to a 'half square knot'.
The difference between a diagonal spiral knot and a vertical spiral knot is that in the vertical spiral knot, the left cord is the working cord, and the remaining cords are the filler cords.
4. Wrap knot
A wrap knot, also known as a 'gathering knot', is the last basic knot to master. Fortunately, this knot is also easy to learn. A wrap knot can be the beginning or a nice finish to your macrame project.
Make a long loop with your cord and place this on top of the other cords to be wrapped. The loop points downwards. Wrap the working cord from the loop around the filler cords from top to bottom. Then thread the working cord through the loop that is still sticking out below. Pull the upper end of the loop cord up, so that the loop below disappears under the windings. Be careful not to pull too far, but still pull far enough to keep the knot in place. You can then cut the cord ends both above and below.